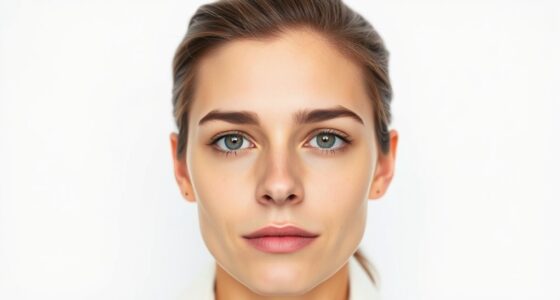
To update your passport photos, guarantee they meet current guidelines: recent, clear, high-quality images with a plain white or off-white background, and a neutral facial expression. The photo should be 2×2 inches, with your head between 1 to 1 3/8 inches high, centered, and in focus. Avoid shadows, glare on glasses, and improper lighting. Following these tips guarantees acceptance, and there’s more to know—keep going for detailed advice to streamline your process.
Key Takeaways
- Use recent, high-quality photos taken within the last six months, with a plain white or off-white background.
- Ensure facial expression is neutral, with both eyes open, and maintain proper head size and positioning.
- Follow specific size requirements, typically 2×2 inches, with head centered and measuring 1 to 1 3/8 inches from chin to top.
- Avoid glare on glasses and shadows on face or background to meet passport photo standards.
- Consider scheduling an appointment at a professional photo center to ensure compliance and quick processing.
Updating your passport photos is a essential step to guarantee your travel documents remain valid and compliant with current regulations. When you’re ready to update your passport photo, understanding the photo specifications is fundamental. The government’s requirements are specific to ensure your photo will be accepted without delays or rejections. Typically, passport photos must be recent, usually taken within the last six months, and printed on high-quality photo paper. The dimensions usually need to be 2×2 inches, with your head occupying 1 to 1 3/8 inches from the bottom of your chin to the top of your head. Additionally, the background should be plain white or off-white, free of shadows or patterns, and your facial expression should be neutral with both eyes open and mouth closed. Wearing glasses is generally discouraged unless you have a medical reason, and if you do wear them, guarantee there is no glare. These photo specifications are strict because they help authorities clearly identify you and prevent fraud. Ensuring proper lighting and background quality can significantly improve the chances of your photo meeting regulations.
Updating passport photos requires recent, high-quality images with specific size, background, and expression standards.
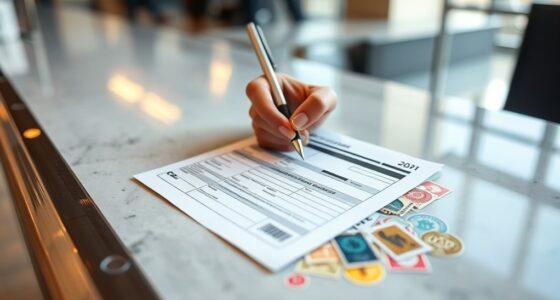
Before you head to a photo location, appointment scheduling can streamline the process. Many passport agencies and photo centers now allow you to book an appointment online, saving you time and making sure you won’t have to wait in long lines. Scheduling an appointment is especially helpful if you’re in a hurry or need multiple copies of your passport photo. When you book, choose a time that allows you to arrive fresh and prepared. Confirm the location’s requirements—some facilities might have specific hours or restrictions, especially during peak travel seasons or special circumstances. Double-check the appointment details before you go, including any documents or forms you need to bring along. This preparation minimizes delays and guarantees your photo session goes smoothly.
When you arrive for your appointment, communicate your needs clearly to the photographer or staff. Follow their instructions carefully, as even minor issues—like improper lighting, shadows, or incorrect background—can result in rejection. If you’re taking the photo yourself at a photo booth or using a home printer, make sure to adhere strictly to the specifications. Use good lighting, avoid shadows on your face or background, and guarantee the photo is recent, properly centered, and in focus. Remember, the goal is to produce a compliant, high-quality image that will expedite your passport application or renewal process. Paying close attention to photo quality and other details can help prevent the need for retakes.
Updating your passport photos may seem straightforward, but paying close attention to photo specifications and scheduling appointments in advance can make the process much easier. By preparing properly and following guidelines, you’ll avoid costly rejections and guarantee your travel documents stay valid and ready for your next journey.

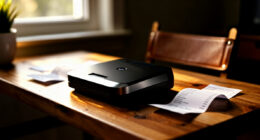
CFS Products Passport Photo Printer System – Preconfigured for US Passports-Includes US Passport Cutter
Includes everything you need to capture & print passport photos
As an affiliate, we earn on qualifying purchases.
As an affiliate, we earn on qualifying purchases.
Frequently Asked Questions
Can I Update My Passport Photo Online?
You can update your passport photo online by using passport photo software that follows digital photo guidelines. Many services allow you to upload your photo, verify it meets size and background requirements, and even edit it for proper lighting and clarity. This makes the process quick and convenient. Just make sure to double-check the digital photo guidelines before submitting, so your new passport photo gets approved without issues.
Are There Size Restrictions for Passport Photos?
Imagine your perfect passport photo—clear and compliant. Yes, there are size restrictions you should follow. Typically, passport photo dimensions are 2×2 inches, but always check your country’s passport photo guidelines, as requirements can vary slightly. Ensuring your photo meets these size restrictions helps avoid delays. Keep your head centered, and avoid shadows or reflections, so your photo aligns with these essential passport photo guidelines.
How Long Does It Take to Process a Passport Photo Update?
Processing times for a photo submission update typically take between 6 to 8 weeks, depending on your location and the current demand. Once you submit your new passport photo, it goes through verification and processing. If you need your updated passport quickly, consider expedited services, which can considerably cut down the processing times. Keep in mind, delays may occur if there are issues with your photo or documentation.
Can I Wear Glasses in My New Passport Photo?
Yes, you can wear glasses in your new passport photo, but make sure you adhere to glasses guidelines to avoid issues. The guidelines typically require clear lenses without glare or reflections, and your eyes should be fully visible. For photo attire tips, opt for simple, neutral clothing that contrasts with your background. Remember, the goal is a clear, recognizable image, so ensure your glasses don’t obscure your face or eyes.
What Should I Do if My Passport Photo Is Rejected?
When your passport photo gets rejected, it can feel like a setback, but don’t worry—you’re not alone. Review the reasons for photo rejection carefully, such as poor lighting or unclear features, and plan a passport photo retake that meets all requirements. Take your time to make sure your new shot aligns with guidelines, so your application moves smoothly forward. Remember, each step gets you closer to your travel goals.

USA Visa Passport ID Photo Print 2 inch x 2 inch 2×2 Customized and Personalized 4 Pack (4 pcs)
You will get four photo prints two inches by two inches for USA passport, visa, citizenship application
As an affiliate, we earn on qualifying purchases.
As an affiliate, we earn on qualifying purchases.
Conclusion
Updating your passport photos might seem like a hassle, but think of it as your chance to capture a fresh, confident version of yourself—kind of like a quick makeover in a photo booth. While the process requires attention to detail, it’s a small step that opens doors to new adventures. So, embrace the moment, smile naturally, and remember: a great passport photo is your ticket to explore the world with confidence and ease.
USA Visa Passport ID Photo Print 2 inch x 2 inch 2×2 Customized and Personalized 4 Pack (4 pcs)
You will get four photo prints two inches by two inches for USA passport, visa, citizenship application
As an affiliate, we earn on qualifying purchases.
As an affiliate, we earn on qualifying purchases.

Passport Size Photo Editor- Background eraser
ERASE BACKGROUND
As an affiliate, we earn on qualifying purchases.
As an affiliate, we earn on qualifying purchases.