
When choosing a photo scanning resolution, aim for at least 300 DPI for small prints and detailed archival work. For large-format prints (over 24 inches), 150-300 DPI works best, with 200-300 DPI recommended for sharp, vibrant results. Lower resolutions risk pixelation or blurriness when enlarged, while higher resolutions produce larger files. Striking the right balance guarantees your images stay high quality without unnecessary storage use—and if you want to learn how to get it just right, keep exploring.
Key Takeaways
- For small prints or digital sharing, 300 PPI is typically sufficient to retain detail and clarity.
- Use 600 PPI or higher for enlargements or detailed archival preservation.
- Adjust resolution based on target output size; larger prints require higher DPI for sharpness.
- Save archival scans in TIFF format to prevent quality loss from compression.
- Balance resolution with file size and storage needs, opting for lower resolutions when quick sharing or saving space.

Plustek Photo Scanner ePhoto Z300, Scans 4×6 inch Photos in 2 Seconds, Auto crop and deskew with CCD Sensor, Supports Mac and PC
The easiest way to scan photos and documents. Supports 3×5, 4×6, 5×7, and 8×10 in sizes photo scanning…
As an affiliate, we earn on qualifying purchases.
As an affiliate, we earn on qualifying purchases.
What Is Photo Scanning Resolution and Why Is It Important?

Certainly! Here’s your revised article subheading content with the requested adjustments:
—
Have you ever wondered why some scanned photos look sharp and detailed while others appear blurry or pixelated? The key lies in photo scanning resolution. Resolution determines how much detail your scanner captures, affecting image clarity. It also impacts color accuracy, ensuring that hues stay true to the original photo. Proper scanner calibration is essential; it aligns the device to produce consistent, high-quality results. When your scanner is well-calibrated, it captures accurate color tones and fine details, preventing issues like dullness or color shifting. Understanding the importance of resolution helps you choose the right settings to preserve your photos’ quality. Ultimately, a good resolution combined with proper calibration guarantees you get crisp, vibrant scans that do justice to your original images. Additionally, regular veterinary visits can enhance the quality of your scans by ensuring that your scanner is functioning optimally. Exploring emerging trends in digital publishing can provide insights into optimizing your scanning process. Using a lightweight foundation can also enhance the quality of images by minimizing glare from the scanner.
—
Feel free to adjust any part of it as needed!

Epson FastFoto FF-680W Wireless High-Speed Photo and Document Scanning System, Black
World’s Fastest Personal Photo Scanner (1) — scan thousands of photos as fast as 1 photo per second…
As an affiliate, we earn on qualifying purchases.
As an affiliate, we earn on qualifying purchases.
Understanding DPI and PPI: What Do These Terms Mean?
Understanding DPI and PPI is vital because these terms directly affect the quality of your scanned images. DPI (dots per inch) refers to the printer resolution, while PPI (pixels per inch) relates to your digital image quality. Higher PPI means more detail, which is essential for accurate color calibration and sharpness. When scanning, paying attention to PPI helps avoid unnecessary file compression, which can reduce image quality. Conversely, low PPI may lead to blurry or pixelated images. DPI is more relevant for printing, but both terms influence how your digital image translates to print quality. Knowing the difference ensures you choose the right scanning settings, balancing detail and file size without sacrificing color accuracy or detail. Additionally, understanding cutting-edge technology can help you appreciate the advancements in scanning techniques that enhance image quality, such as high-resolution imaging that captures more detail than ever before. High-quality scans benefit from color accuracy, as it significantly improves the overall visual appeal of your images.
Plustek Photo Scanner ePhoto Z300, Scans 4×6 inch Photos in 2 Seconds, Auto crop and deskew with CCD Sensor, Supports Mac and PC
The easiest way to scan photos and documents. Supports 3×5, 4×6, 5×7, and 8×10 in sizes photo scanning…
As an affiliate, we earn on qualifying purchases.
As an affiliate, we earn on qualifying purchases.
How to Decide the Right Resolution for Your Photos
To choose the right resolution, consider whether you’ll print, share online, or keep the photo for personal use. Your original photo quality also affects how much detail you can preserve without losing clarity. Making these decisions helps guarantee your scans meet your specific needs. Additionally, understanding optimal scanning resolutions can significantly enhance the clarity and detail of your images. Exploring digital content formats can also provide valuable insights into how different resolutions perform across various platforms. Moreover, recognizing how information structures influence image presentation can further refine your scanning choices. Using support networks can also provide valuable guidance on selecting the best resolution for your needs.
Purpose of Printing or Sharing
Deciding on the right resolution for your photos hinges on how you plan to use them. If you’re printing large photos, you’ll want a higher resolution to maintain color accuracy and detail. For sharing online or through social media, a lower resolution often suffices, reducing file size and easing file compression. Consider that higher resolutions preserve quality but create larger files that may be harder to upload or email. Conversely, a lower resolution can result in loss of detail but makes storage and sharing simpler. Think about the final destination—if the image will be viewed on screens, optimize resolution for clarity without unnecessarily increasing file size. Balancing quality and practicality guarantees your photos look great while remaining easy to handle and share.
Original Photo Quality
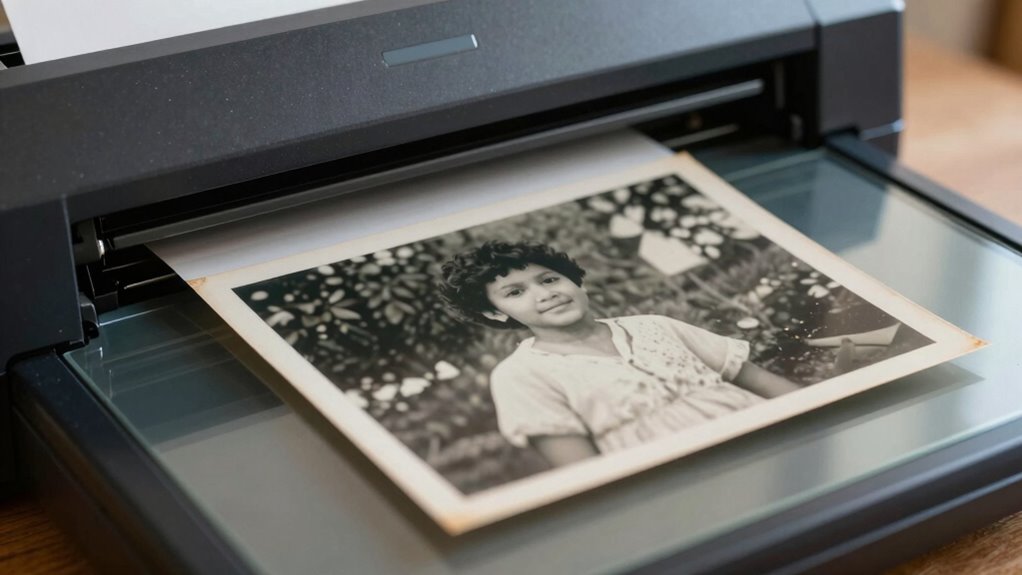
When evaluating your original photo quality, focus on the details captured in the image and the conditions under which it was taken. Check for color accuracy, ensuring the photo accurately represents the original scene without unnatural tint or fading. If you’re working with archival materials, consider their age and condition, as older photos may require higher resolution for clarity and detail preservation. The quality of the original impacts your scanning decision; a sharp, well-preserved photo needs less enhancement, while a faded or damaged one might benefit from a higher resolution scan. Additionally, understanding essential oils for toothache relief can provide insights into the importance of preserving intricate details in your images. To enhance the overall presentation of your scanned photos, consider using crystal glassware and decanters as an elegant display option. Ultimately, understanding the original photo’s quality helps you choose the right resolution to preserve its details, colors, and overall integrity for future use. Moreover, considering website performance metrics can help you assess the best practices for optimizing scanned images for online sharing. Additionally, monitoring credit scores can be beneficial when assessing the financial implications of preserving and digitizing valuable materials.

DSLRKIT Lens Focus Calibration Tool Alignment Ruler Folding Card(Pack of 2)
This compact ruler allows you to determine if your lens is auto-focusing accurately as it should. It is…
As an affiliate, we earn on qualifying purchases.
As an affiliate, we earn on qualifying purchases.
Best Resolution Settings for Archiving Family Photos
Choosing the right resolution settings is essential for effectively archiving your family photos. Aim for a resolution of at least 300 DPI to capture details clearly, especially for smaller prints or if you plan to do color correction later. Higher resolutions preserve image quality during editing and guarantee the photos remain sharp over time. Additionally, using a free online tool can help you explore different text capitalization styles for any accompanying descriptions or labels. Save your scans in versatile file formats like TIFF or high-quality JPEG; TIFF is ideal for archiving because it’s lossless, while JPEG offers smaller file sizes. When selecting resolution, consider your storage capacity and future use, balancing quality with practicality. This approach assures your family photos stay vibrant and detailed, whether you view them digitally or print them in the future. Additionally, just like choosing unique beetroot recipes, selecting the right resolution enhances the overall quality of your archived memories. Properly scanning your photos can also help in maintaining photo integrity over time, ensuring they last for generations. To achieve an optimal balance, consider the best woods for farmhouse tables, which can inspire you to think about the longevity and durability of your digital memories as well. Remember that using essential DIY tools can enhance your scanning process, making it more efficient and effective.
What Resolution Do You Need for Large-Format Prints?
Sure! Here’s your revised article subheading content with the requested changes:
—
To achieve high-quality large-format prints, you need a resolution that provides enough detail to prevent pixelation or blurriness. For prints larger than 24 inches, aim for a resolution of at least 150-300 DPI, depending on viewing distance. Ensuring proper color calibration helps your prints maintain accurate color reproduction, especially when dealing with different ink compatibility. Keep in mind that lower resolutions can cause blurriness, while higher resolutions may be unnecessary and increase file size. Consider the following:
- Use a resolution of 200-300 DPI for vibrant, sharp prints.
- Calibrate colors for consistency across various printing devices.
- Match resolution to your printer’s ink compatibility to optimize quality and longevity. Regular use of glycolic acid in your skincare routine can enhance your skin’s texture, contributing to an overall polished appearance in photographs. Additionally, outdoor cooling fans can provide a comfortable environment for photographers working on large-format prints outdoors. A well-chosen flywheel upgrade can significantly enhance performance, just as balancing resolution with these factors leads to stunning large-format prints without sacrificing detail or color accuracy. Additionally, understanding food safety regulations can enhance your decision-making when selecting printing services and materials.
—
Let me know if you need any further adjustments!
Common Mistakes to Avoid When Choosing Photo Resolution
One common mistake is selecting a resolution that’s too low, which leads to pixelated or blurry images, especially when enlarging or printing in high quality. Low resolutions can also compromise color accuracy, making photos look dull or washed out. Additionally, some might opt for smaller file sizes by relying on aggressive file compression, but this reduces image detail and can distort colors. Avoid choosing a resolution solely based on convenience or storage concerns; instead, prioritize a balance between quality and file size. Higher resolutions preserve color fidelity and detail, ensuring your scans look sharp and true to the original. Remember, sacrificing resolution for smaller files can hinder future editing or printing needs, so choose wisely to get the best long-term results.
How to Adjust Resolution Settings on Your Scanner or App
Adjusting resolution settings on your scanner or app is straightforward once you know where to look. Typically, you’ll find these options in the scan settings menu. To optimize your scan, consider adjusting the resolution based on your needs, and don’t forget to select the appropriate file format for easy editing and sharing. When changing resolution, think about these key steps:
- Choose a resolution that balances detail with file size, considering if you need high detail for enlargements.
- Enable color correction if your photos have color issues, ensuring accurate colors in the final scan.
- Select a file format like JPEG or TIFF, depending on whether you prioritize compression or quality.
Finding the Right Balance: When Higher Resolution Isn’t Always Better
Choosing a higher resolution can make your photos look sharper, but it also increases file size and scanning time. If you’re just digitizing old family photos for quick sharing, a lower resolution might be enough. Consider your goal to find the best balance between quality and efficiency.
File Size Considerations
While higher resolution scans can capture more detail, they also produce considerably larger file sizes that may become unwieldy to store and share. Large files can impact your storage capacity and slow down upload or download times. To manage this, consider the balance between resolution and file compression, which affects both size and color accuracy.
- Use compression formats like JPEG or PNG to reduce file size without sacrificing too much quality.
- Keep in mind that excessive compression may compromise color accuracy, making photos look dull or inaccurate.
- Adjust resolution settings based on your intended use; for printing, higher resolution is beneficial, but for digital sharing, moderate resolution suffices.
Finding the right balance helps maintain quality while keeping file sizes manageable.
Scanning Time Trade-offs
Higher resolution scans take more time to complete, which can slow down your workflow and delay project completion. When you choose a higher resolution, the scanning process becomes longer, especially if you plan to perform color correction afterward. This extra time can add up, particularly when scanning multiple images. Additionally, larger file formats resulting from high-res scans require more storage space and can complicate editing or sharing. If your goal is quick turnaround or frequent edits, balancing resolution with efficiency is key. Consider whether the extra detail is necessary for your project’s purpose. Sometimes, a lower resolution can deliver satisfactory quality with less time spent on scanning, color correction, and managing file formats, helping you stay on schedule without sacrificing essential details.
Purpose-Driven Resolution
Determining the right scanning resolution depends on your project’s specific needs rather than defaulting to the highest setting. Higher resolution isn’t always necessary and can create issues like larger file sizes or reduced color accuracy. Consider what matters most: if you’re preserving fine details for archival purposes, a higher resolution might be justified. However, for sharing or quick reference, lower resolutions can suffice and improve scanner compatibility. Keep in mind:
- Higher resolutions may strain your scanner’s capabilities, affecting color accuracy.
- Opting for a balanced resolution guarantees compatibility across devices and software.
- Think about your end goal—do you need detailed prints, or are digital versions enough?
Finding the right balance prevents wasted effort and ensures your scans meet your needs without sacrificing quality or performance.
Tips for Preserving Photo Quality During Digital Storage
To preserve your photo quality during digital storage, it’s vital to choose the right file formats and settings. Use formats that maintain color accuracy, such as TIFF or PNG, especially for high-quality archives. Avoid lossy formats like JPEG unless necessary, and always save backups in multiple storage formats. Properly organizing files enhances long-term preservation. Consider the following table:
| Storage Format | Pros | Best Use |
|---|---|---|
| TIFF | Lossless, high color accuracy | Archiving, editing |
| PNG | Lossless, supports transparency | Web images, print |
| JPEG | Small size, widely compatible | Sharing, casual use |
| RAW | Maximum detail, flexible editing | Professional editing |
| Document preservation | Digital albums, printing |
Choosing suitable formats and maintaining organized backups ensures your photos stay crisp and true to their original quality over time.
Frequently Asked Questions
How Does Photo Resolution Affect Digital File Sizes?
Higher photo resolution increases digital file sizes because it captures more detail, making files larger. When you perform scan calibration at higher resolutions, you preserve more image info, but it also creates bigger files. You need to weigh resolution trade-offs: lower resolution reduces file size but may lose detail, while higher resolution offers better quality but demands more storage. Balance your needs to choose the right resolution for your project.
Can Higher Resolution Improve Photo Editing Flexibility?
Higher resolution definitely improves your photo editing flexibility. Studies show that images with a resolution of 300 DPI or higher offer markedly better resolution vs. detail, allowing you to crop or retouch without losing quality. This increased resolution enhances editing precision, letting you make finer adjustments, remove imperfections more accurately, and create high-quality enlargements. So, investing in higher resolution images gives you more control and better results during editing.
What Are the Best Formats for Storing High-Resolution Scans?
You should store high-resolution scans in formats like TIFF or PNG, as they preserve color depth and minimize compression artifacts. TIFF offers lossless quality, making it ideal for archival purposes, while PNG also maintains high quality with efficient compression. Avoid formats with heavy compression like JPEG, which can introduce artifacts and reduce color accuracy. These formats guarantee your scans retain their detail and fidelity over time.
How Does Resolution Impact Online Photo Sharing Quality?
Higher resolution images look sharper when you share them online, but too much resolution can cause issues. Image compression during uploading can reduce quality, especially if your photo has a high resolution. Also, your screen display size impacts how clear the image appears; smaller screens may not show all details of a high-res photo. To optimize quality, balance your resolution with compression and consider the display device’s capability.
Is There a Resolution Limit for Printing at Home?
Yes, there’s a resolution limit for printing at home, usually around 300 DPI for high-quality prints. To get the best results, you should guarantee your scanner is well-calibrated, which helps maintain color accuracy and sharpness. If your scan’s resolution exceeds your printer’s capabilities, you won’t see a noticeable difference and may waste storage. Keep your scanner calibrated and stick to recommended DPI settings for ideal print quality.
Conclusion
Choosing the right photo scanning resolution is like tuning an instrument—you want it just right to produce beautiful results. By understanding DPI and PPI, avoiding common mistakes, and balancing quality with file size, you can preserve your memories perfectly. Remember, higher isn’t always better, so find the sweet spot that suits your needs. With these tips, you’ll keep your photos sharp and vibrant, ensuring they stand the test of time like a treasured melody.