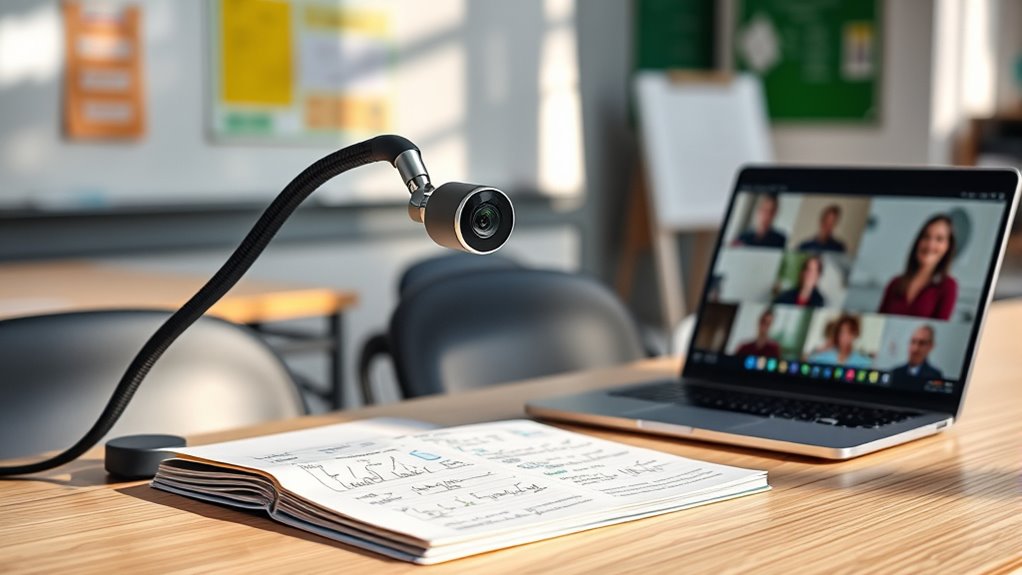
To set up your document camera for online meetings, start by positioning it directly above or slightly in front of your materials using an adjustable stand to guarantee full visibility. Adjust the angle and focus so the image is sharp and centered, while eliminating clutter in the background. Use soft, diffuse lighting on both sides to avoid shadows or glare. Test your setup in your conferencing software and make necessary tweaks for clarity and stability. Keep going to discover more tips for a perfect setup.
Key Takeaways
- Position the camera directly above or slightly in front of the document for clear, undistorted images.
- Adjust focus and framing to ensure the entire document is visible and sharp.
- Use soft, diffuse lighting on both sides to eliminate shadows and glare.
- Connect the camera to your computer and test recognition in your meeting software.
- Secure the camera stably and perform a quick test to verify image clarity before presenting.
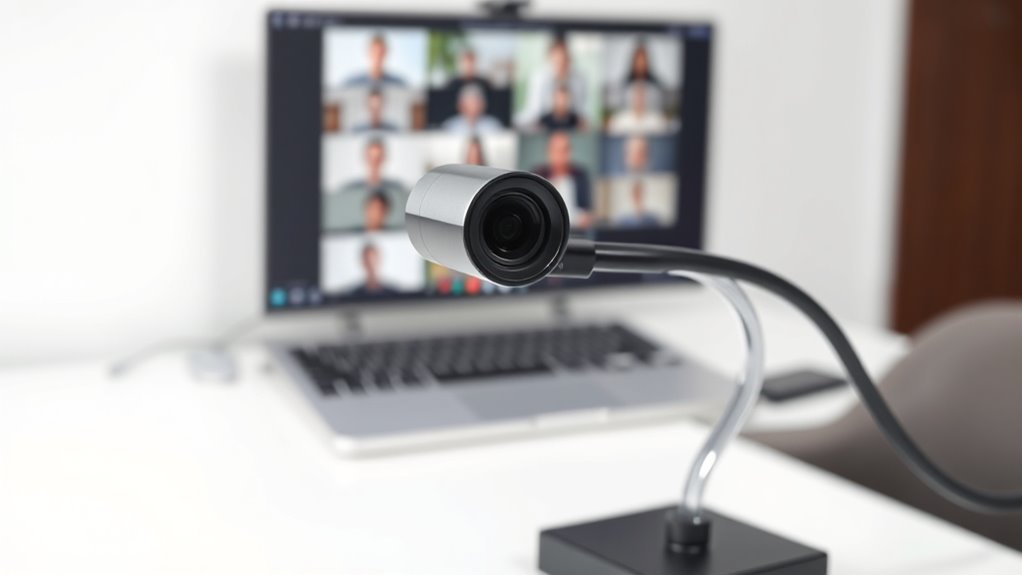
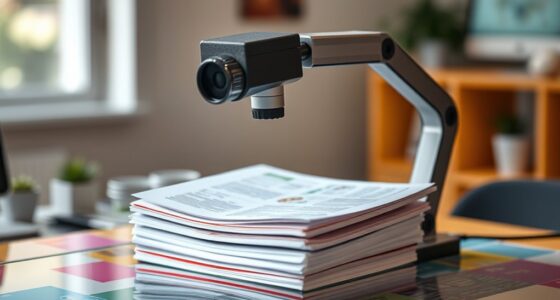
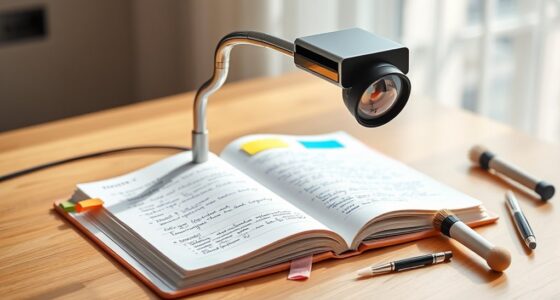
Setting up a document camera might seem straightforward, but ensuring it’s properly configured can make a big difference in your teaching or presentation. The first step is to focus on camera placement. Position the camera directly above or slightly in front of the object or document you want to display. This guarantees viewers see a clear, undistorted image. Avoid placing the camera too high or at an odd angle, as this can cause distortion or obscure details. If your camera has adjustable arms or stands, use them to fine-tune the angle, making sure the subject is centered and fills the frame without unnecessary background clutter. Proper camera placement is vital because it determines how easily your audience can follow along with what you’re showing. Take a moment to test different angles and distances, ensuring the entire document or object is visible and in focus. Durable construction of the camera and stable positioning can prevent unwanted shifts during your presentation. Next, set up your lighting. Good lighting is essential; poor lighting can make even the best camera setup look dull or blurry. Start by eliminating harsh shadows that can obscure details. Use soft, diffuse light sources—such as lamps with lampshades or ring lights—to evenly illuminate your subject. Position the lights on either side of the camera or object to minimize shadows and highlight details clearly. Avoid direct overhead lighting, which can create glare or reflections, especially on glossy surfaces like paper or laminated materials. Adjust the brightness and color temperature of your lights to match the room’s ambient lighting. Ideally, aim for a neutral, daylight-balanced tone to accurately represent colors and details. If possible, test your setup before your actual presentation or class, making sure the object is brightly lit without overexposure or dark spots. Once your camera is correctly placed and your lighting setup is in place, connect your document camera to your computer and make sure it’s recognized by your conferencing software. Position the camera in a stable location to prevent accidental shifts during your presentation. Do a quick test run to check the focus and clarity, making adjustments as needed. Remember, the goal is to deliver a clear, well-lit view of your materials, so viewers can easily follow what you’re presenting. Proper camera placement combined with a thoughtful lighting setup makes a noticeable difference, transforming a simple document camera into an effective teaching or presentation tool that keeps your audience engaged and focused on your content.

IPEVO V4K Ultra High Definition 8MP USB Document Camera — Mac OS, Windows, Chromebook Compatible for Live Demo, Web Conferencing, Distance Learning, Remote Teaching, Green
Features an 8 Megapixel camera for capturing Ultra High Definition live images up to 3264 x 2448 pixels
As an affiliate, we earn on qualifying purchases.
As an affiliate, we earn on qualifying purchases.
Frequently Asked Questions
How Do I Connect My Document Camera to a Smartphone?
To connect your document camera to your smartphone, check if it supports wireless connection and camera compatibility with your device. Enable Wi-Fi or Bluetooth on your camera, then open the relevant app or settings on your phone. Follow the prompts to pair or connect wirelessly. Make sure your camera and smartphone are on the same network or Bluetooth range. This setup allows seamless streaming of your document camera’s view directly on your smartphone.
What Software Is Best for Live Streaming With a Document Camera?
Think of software options as your digital bridge, connecting your document camera to the world. For live streaming, OBS Studio and Streamlabs are top-tier, offering versatile tools and seamless integration with popular streaming platforms like YouTube and Twitch. These platforms turn your camera into a vibrant storyteller, allowing you to share visuals in real-time. Choose one that fits your needs, and watch your presentations come alive with clarity and impact.
How Can I Adjust the Focus During a Meeting?
During a meeting, you can adjust the focus of your document camera by using the auto focus adjustment feature for quick, effortless clarity. If you prefer more control, switch to manual focus and rotate the focus ring until the image is sharp. Keep in mind that auto focus works best for changing objects, while manual focus gives you precise control when the subject stays still.
Is It Possible to Record Video Directly From the Document Camera?
Yes, you can record video directly from your document camera by adjusting the camera setup to enable recording features. For example, during a science class, a teacher records a detailed experiment using the document camera’s built-in recording function. To do this, make certain your camera supports video recording, connect it to your computer if needed, and use compatible software. This way, you preserve important lessons or demonstrations effortlessly.
What Are Common Troubleshooting Steps for Camera Connectivity Issues?
If you’re experiencing camera connectivity issues, start by checking the video cable for any damage or loose connections. Confirm the power supply is secure and the document camera is turned on. Restart your computer and reconnect the camera. Update your device drivers and software if needed. If problems persist, try a different USB port or cable, as faulty connections or power supply problems often cause these issues.
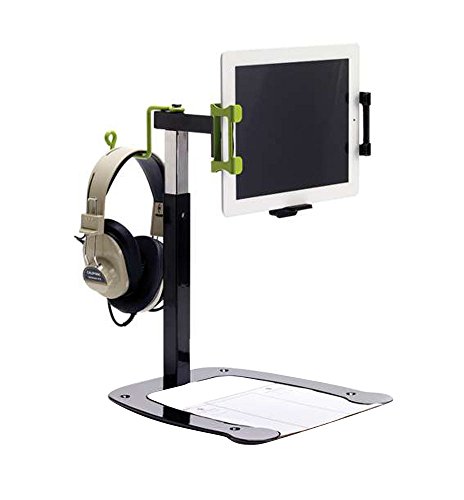
Copernicus Dewey The Document Camera Stand for Smartphones and iPads Suitable for Classroom and Distance Learning
UNIVERSAL DEVICE COMPATIBILITY – Features a spring-loaded clamp that holds all versions of iPad (excluding 12.9" iPad Pro)…
As an affiliate, we earn on qualifying purchases.
As an affiliate, we earn on qualifying purchases.
Conclusion
Now that you’ve set up your document camera, you’re ready to enhance your online meetings with clear, professional visuals. With a little practice, switching between your camera and other tools will become second nature. So, why settle for just a webcam when you can bring your presentations to life? Give it a try and see how much more engaging your meetings can be. After all, isn’t making your point easier worth a few extra steps?

INSWAN INS-1 Classic USB Document Camera/Webcam, 8MP, Built-in LED, Mic
[Crystal-Clear Imaging and Smooth Video Streaming] 8 Megapixel Ultra-High definition SONY camera captures live images at up to…
As an affiliate, we earn on qualifying purchases.
As an affiliate, we earn on qualifying purchases.

Evershop Ring Light for Laptop Desk Clip On,Small Computer Video Conference Lighting with Stand for Phone/Webcam/Monitor,5" Portable Mini LED Selfie Light Desktop for Zoom Meeting/Video Call/Recording
New Adjustable Multifunctional Stand : 2025new upgraded ring light, using a new design concept. Perfectly circumvent the traditional…
As an affiliate, we earn on qualifying purchases.
As an affiliate, we earn on qualifying purchases.