
To teach on Zoom without losing your mind, set up your document camera for quick, smooth handoffs. Choose a high-resolution, easy-to-use model, and position it at eye level with good lighting to keep visuals clear. Connect it securely to your computer and select it as your video source. Prepare visuals in advance and practice quick switches between materials. Maintaining routines, troubleshooting common issues early, and staying organized helps keep your lessons seamless. Keep going to discover more efficient tips and tricks.
Key Takeaways
- Prepare and test your document camera setup before each lesson to ensure smooth transitions and clear visuals.
- Use keyboard shortcuts or switcher tools to quickly change visuals and keep students engaged.
- Maintain proper lighting and camera positioning to produce bright, shadow-free images.
- Develop a lesson checklist and visuals in advance to streamline demonstrations and reduce on-the-spot stress.
- Regularly troubleshoot hardware and software issues to prevent interruptions during live teaching.

IPEVO V4K Ultra High Definition 8MP USB Document Camera — Mac OS, Windows, Chromebook Compatible for Live Demo, Web Conferencing, Distance Learning, Remote Teaching, Green
- High-Resolution Camera: 8MP Ultra HD live images
- Smooth Live Streaming: Up to 30 fps at full HD
- Fast Focusing: Minimizes interruptions during use
As an affiliate, we earn on qualifying purchases.
As an affiliate, we earn on qualifying purchases.
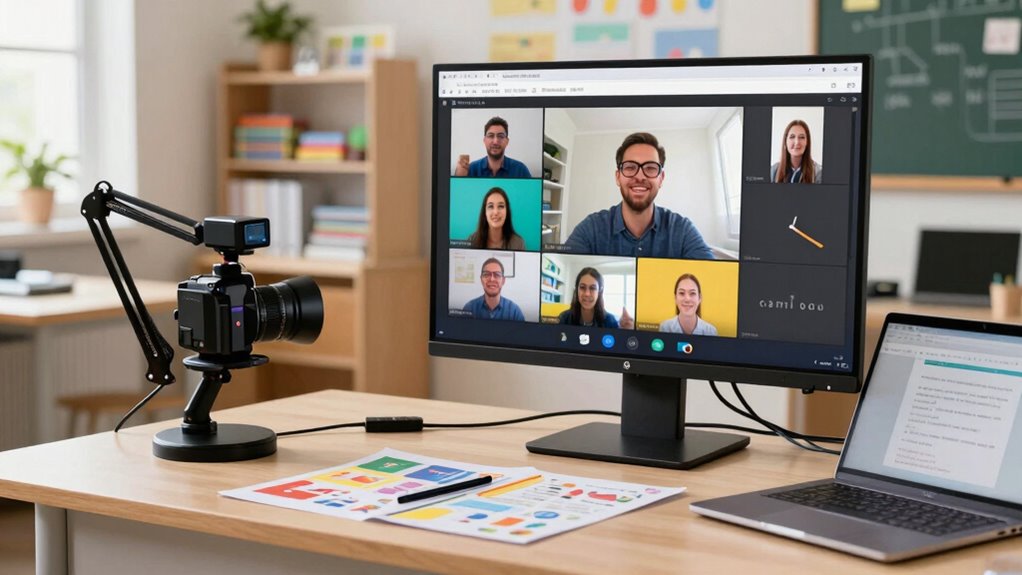
Why Use a Document Camera With Zoom for Teaching?
Using a document camera with Zoom can markedly enhance your teaching by providing clear, close-up views of physical materials. This tool leverages the benefits of visual learning, making complex concepts easier to understand. When students see detailed images of textbooks, diagrams, or experiments in real time, their comprehension improves. Additionally, it boosts student engagement by making lessons more interactive and visually stimulating. Students are more likely to stay focused and participate actively when they can see tangible examples clearly. A document camera bridges the gap between physical and digital learning, helping you create a dynamic classroom environment. By integrating this tech, you make lessons more accessible and engaging, ultimately fostering deeper understanding and increased involvement from your students. Incorporating a document camera can also enhance color accuracy in your visual presentations, ensuring that important details are presented clearly. Furthermore, utilizing fire pits in a backyard setting can create a cozy atmosphere for student discussions or group activities outside of the usual classroom. Moreover, utilizing early socialization techniques in your teaching methods can further facilitate student engagement and learning. This approach aligns with the idea of exploring new frontiers in digital content, allowing for innovative teaching strategies that can adapt over time. Additionally, using tools like kitchen gadgets can help streamline your lesson preparation, making it easier to present cooking-related topics effectively.
IPEVO V4K Ultra High Definition 8MP USB Document Camera — Mac OS, Windows, Chromebook Compatible for Live Demo, Web Conferencing, Distance Learning, Remote Teaching, Green
- High-Resolution Camera: 8MP Ultra HD live images
- Smooth Live Streaming: Up to 30 fps at full HD
- Fast Focusing: Minimizes interruptions during use
As an affiliate, we earn on qualifying purchases.
As an affiliate, we earn on qualifying purchases.
How to Choose the Right Document Camera for Your Classroom
Choosing the right document camera for your classroom starts with understanding your specific teaching needs and technical setup. Consider the document camera benefits, such as high-resolution imaging, ease of use, and durability, to guarantee it supports your lessons effectively. Think about how well it integrates into your classroom environment—look for models with straightforward classroom integration features like adjustable arms, flexible mounting options, and compatibility with your existing devices. If you teach hands-on activities, prioritize cameras with good zoom capabilities and clear image quality. Regular maintenance of your document camera, similar to how you care for cycling gear, can significantly extend its lifespan. Additionally, keeping your camera clean, much like cleaning glass on a wood stove, is essential for optimal performance. To ensure your document camera is performing at its best, consider straining paint through filters, as this can improve clarity and reduce distractions. Budget is also a factor; balance affordability with essential features. By focusing on your unique instructional requirements and how the camera will fit into your tech ecosystem, you’ll select a device that enhances your teaching without adding unnecessary complexity. Additionally, understanding regional flavors can inspire creative ways to engage students during lessons.
![[UL Listed] OMNIHIL 8 Feet Long AC/DC Adapter Compatible with Elmo 1304 Model TT-02Rx 1.3 mp, 41.6X Zoom Teachers Tool Digital Visual Presenter, Remote](https://m.media-amazon.com/images/I/41fArKQMB-L._SL500_.jpg)
[UL Listed] OMNIHIL 8 Feet Long AC/DC Adapter Compatible with Elmo 1304 Model TT-02Rx 1.3 mp, 41.6X Zoom Teachers Tool Digital Visual Presenter, Remote
- Adapter Voltage Range: 100V-240V, 50/60Hz
- UL Listed Certification: UL Listed for safety
- Quality Tested: Meets or exceeds standards
As an affiliate, we earn on qualifying purchases.
As an affiliate, we earn on qualifying purchases.
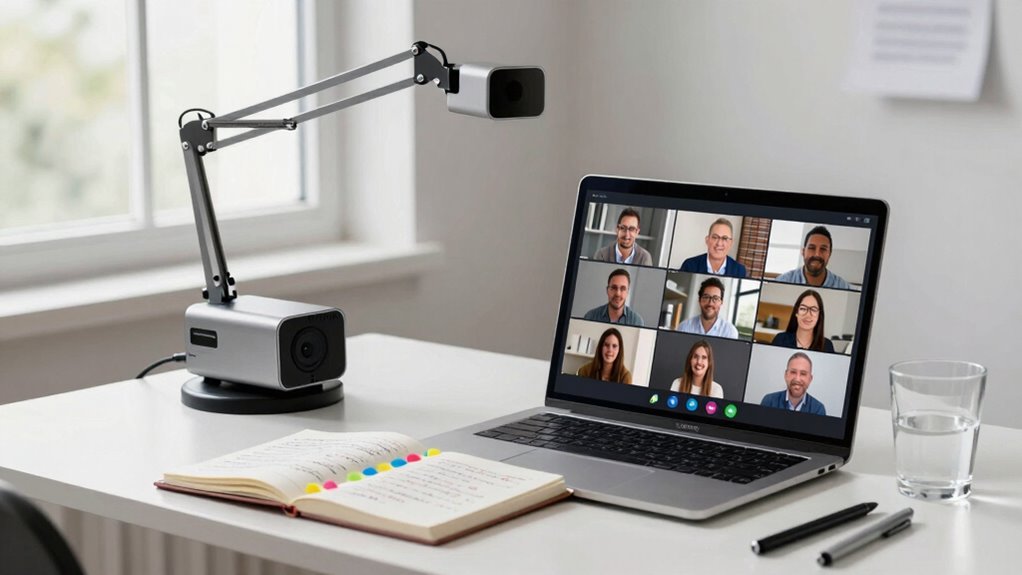
Getting Your Document Camera Set Up for Zoom
Getting Your Document Camera Set Up for Zoom
Setting up your document camera for Zoom may seem intimidating at first, but with a few straightforward steps, you can have it ready in no time. Start by connecting the camera to your computer via USB or HDMI, depending on your device. Install any necessary drivers or software recommended by the manufacturer. Once connected, open Zoom and go to Settings > Video, then select your document camera as your video source. This simple setup allows you to incorporate creative lesson planning by displaying detailed visuals or student work. Clear visuals boost student engagement, making lessons more interactive and dynamic. Additionally, consider using essential oils for respiratory health to create a calming environment that enhances focus. Test the camera before your class to ensure everything functions smoothly. With your document camera set up correctly, you’ll be ready to deliver engaging, visually rich lessons on Zoom.

AlKOR USB Document Camera for Teaching & Distance Learning,Manual Focus Webcam with Mic, Foldable Design for Mac OS/Windows/Chromebook-Online Classes, Web Conferencing & Live Demos,Remote Work
- Versatile 3-in-1 Device: Webcam, document camera, visualizer
- Adjustable Rotating Lens: Allows live image clarity adjustments
- Flexible Hose Design: Adjusts to any angle for optimal view
As an affiliate, we earn on qualifying purchases.
As an affiliate, we earn on qualifying purchases.
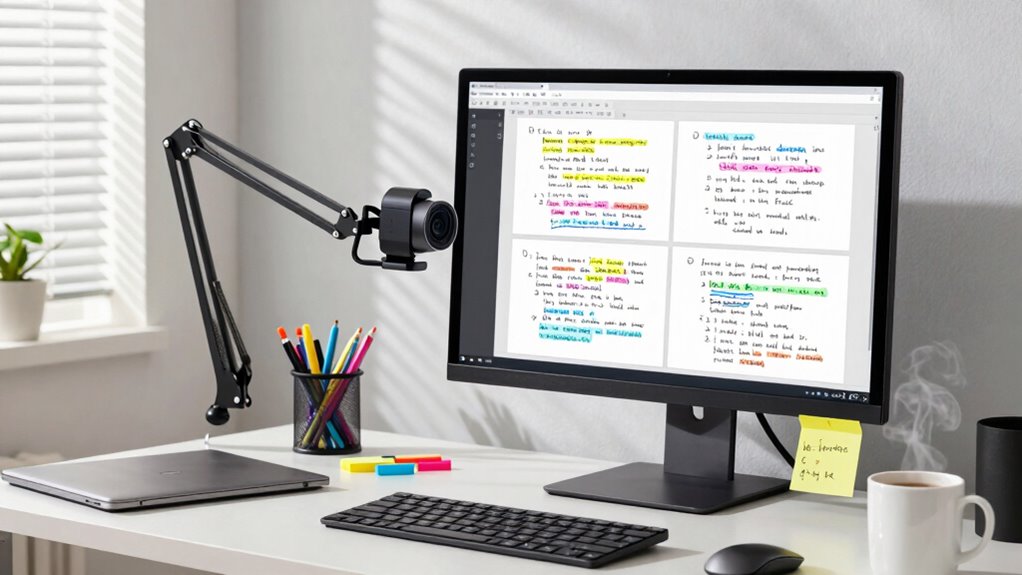
Positioning and Lighting Tips for Clear Visuals
To get clear visuals on Zoom, start by placing your camera at eye level to create a natural, engaging view. Make sure your lighting is bright but even, avoiding harsh spots that can cause glare or shadows. Adjust your setup to minimize reflections and shadows, so your audience focuses on what you’re sharing. Incorporating halal-friendly cooking ideas can also engage your students by connecting lessons to culturally relevant content. Additionally, understanding email security measures can help ensure that your communication with students remains safe and effective. Using aromatherapy techniques can enhance the learning environment by promoting relaxation and focus. Remember, effective teaching is often supported by smart lifestyle upgrades that facilitate better living and working conditions. Utilizing sulfate-free options in hair care can also be an interesting topic to discuss, especially for students interested in health and beauty.
Optimal Camera Placement
Positioning your camera at eye level is key to creating a natural and engaging presence during Zoom calls. Proper camera angles help you connect with your audience and guarantee your face is clearly visible. Avoid placing the camera too high or low, which can distort your appearance or create awkward framing. For ideal visual clarity, keep the camera steady and centered on your face or workspace. Experiment with angles to find what feels most comfortable and professional. Lighting plays a role in visibility, but focus first on placement for sharpness and clarity. Remember, a well-placed camera reduces distractions and makes your teaching more effective. Keep it simple, steady, and at eye level for the best results.
Enhance Lighting Conditions
Good lighting can make or break your Zoom presentation. It creates the right lighting ambiance, ensuring your visuals are clear and engaging. To optimize natural illumination, position your document camera near a window, but avoid direct sunlight that causes glare. Use soft, diffused light sources to evenly illuminate your workspace, reducing harsh shadows.
Here are some tips:
- Place your light source at a 45-degree angle to prevent glare and shadows.
- Use adjustable lamps to control brightness and direction.
- Balance natural light with ambient indoor lighting for consistent visuals.
Minimize Glare and Shadows
Even with the best lighting setup, glare and shadows can still obscure your visuals if you’re not careful with your positioning. To achieve effective glare reduction, position your light sources at a 45-degree angle relative to your document camera. Avoid placing lights directly above or behind the camera, as this causes glare and reflections. For shadow management, make sure your light sources are diffused or softened, reducing harsh shadows on your materials. Adjust the camera angle and height to minimize shadow cast by your hands or objects. Use multiple light sources if needed, balancing their intensity to create even illumination. Regularly check your visuals from the student’s perspective, making fine adjustments to improve clarity. Proper positioning and lighting are key to keeping your visuals sharp and glare-free.
Connecting Your Document Camera to Your Computer and Zoom
To get your document camera working smoothly with Zoom, you need to connect the hardware correctly and make sure your computer recognizes the device. Then, adjust Zoom’s settings so your camera appears as the main video source. Properly configuring these steps will keep your lessons clear and frustration-free. Additionally, using smart furniture solutions can help optimize your teaching space for better organization and accessibility. Incorporating burnout prevention strategies into your workflow can also enhance your overall teaching experience and well-being. It’s essential to maintain good air quality benefits in your teaching environment, as this can positively impact focus and engagement. Furthermore, understanding media literacy principles can aid in navigating digital content more effectively. Be sure to consider your privacy policy to protect your students’ data while teaching online.
Connecting Hardware Properly
Connecting your document camera to your computer and Zoom might seem straightforward, but ensuring proper setup is essential for smooth teaching. When everything is correctly connected, you can focus on creative lesson planning and boosting student engagement without technical hiccups.
To do this, check these key points:
- Use the correct cable (USB, HDMI, or other) and connect it securely to your computer.
- Select the document camera as your video source in Zoom’s video settings.
- Test the camera preview before your lesson to confirm clear image quality and proper focus.
Proper hardware setup minimizes distractions and keeps your lesson flowing seamlessly, helping you stay confident and engaged while teaching.
Configuring Zoom Settings
Once your document camera is physically connected to your computer, the next step is to configure Zoom settings so your camera appears correctly during your lesson. Open Zoom and go to Settings, then select Video. From the dropdown menu, choose your document camera as the primary video source. Adjust the framing and focus to guarantee clarity, which helps maintain student engagement. Creative lesson planning relies on clear visuals, so test the feed beforehand. If your camera isn’t showing up, try reinstalling drivers or reconnecting the device. Properly configured Zoom settings with your document camera create a seamless experience, allowing you to focus on delivering engaging, interactive lessons that keep your students interested and involved throughout your lesson.
Organizing Your Workflow for Smooth Lessons
A well-organized workflow is essential for delivering smooth, stress-free lessons on Zoom. When your lesson planning is structured, you can quickly access materials, reducing downtime and confusion. Keep your document camera setup ready, so you’re not scrambling during class. Focus on engaging students by having clear visuals and progressions prepared ahead of time. To achieve this, consider:
- Creating a checklist for each lesson to ensure all materials are ready
- Designing a consistent visual layout to maintain clarity
- Setting specific times for changing visuals, so students stay engaged
This approach minimizes disruptions and keeps students involved. An organized workflow boosts your confidence and helps deliver a seamless lesson, making your teaching experience more enjoyable and effective.
Sharing Multiple Visuals During a Live Class
Having your workflow organized helps guarantee smooth lessons, but managing multiple visuals during a live class can still pose challenges. To keep your audience engaged, use visual storytelling to seamlessly shift between different visuals. Prep your visuals in advance and switch quickly to maintain flow. Use a dedicated switcher tool or software that allows you to display multiple visuals side-by-side or one after another. Here’s an example of how you might organize your visuals:
| Visual Type | Purpose | Shift tip |
|---|---|---|
| Document Camera | Close-up detail | Use quick keyboard shortcuts |
| Slides | Main points | Use a spotlight feature |
| Videos | Demonstrations | Pause and switch smoothly |
This approach enhances your creative presentation and keeps students engaged.
Troubleshooting Common Document Camera Problems
When your document camera isn’t working properly, start by checking the image clarity and adjusting the focus or lighting. Next, verify all connection steps, including cables and Wi-Fi, to guarantee everything is properly linked. Additionally, ensure that AI Cybersecurity Jobs are prioritized in your institution to safeguard against potential digital threats. It’s also helpful to consult precious metal investment options which can provide financial stability during uncertain times. Finally, perform power and hardware checks to confirm the device is turned on and functioning correctly before troubleshooting further. Additionally, ensure that cable management solutions are implemented to prevent future connectivity issues. Incorporating aquatic exercises can also provide a refreshing break during long teaching sessions.
Image Clarity Issues
Image clarity issues are among the most common problems you’ll encounter with document cameras, and they can be frustrating during lessons. Poor image resolution makes details hard to see, while improper focus adjustment leaves your image blurry or fuzzy. To fix this, start by checking the camera’s settings—adjust the focus wheel or button until the image sharpens. Make certain the document is well-lit, as low light can reduce clarity. Sometimes, the camera lens may need cleaning or repositioning.
Here are some key points to troubleshoot:
- Verify the camera’s image resolution settings are optimized for clarity
- Use focus adjustment controls to sharpen the image
- Clean the lens to remove dust or smudges that blur the view
Connection Troubleshooting Steps
Connection issues are among the most frustrating problems you’ll face with document cameras during lessons. To troubleshoot, start by checking your wireless connectivity. Confirm the camera is within range and that your Wi-Fi is stable. Switch to a wired connection if possible for better reliability. Next, verify software compatibility—make sure your camera’s drivers and app are updated and compatible with your operating system. Additionally, consider using a GPS tracker for monitoring your camera’s position during lessons to avoid connectivity loss.
| Wireless Connectivity | Software Compatibility |
|---|---|
| Signal strength issues | Outdated drivers or app |
| Distance from router | Conflicting software |
| Interference from other devices | Compatibility updates needed |
These steps help isolate whether the problem stems from connectivity or software issues, streamlining your troubleshooting process.
Power and Hardware Checks
Power and hardware issues are common culprits behind document camera problems, and addressing them early can save you time and frustration. First, check the power supply—ensure the camera is plugged in securely and the outlet works. Sometimes, the power cord may be loose or damaged, preventing proper operation. Next, verify hardware compatibility; confirm your device supports the camera model and that any necessary drivers are installed correctly. Finally, inspect for physical damage or loose connections inside the camera or cables. An unstable connection or incompatible hardware can cause the camera to malfunction or not turn on at all. By systematically checking these elements, you can quickly identify and resolve power and hardware issues, minimizing disruptions during your teaching sessions.
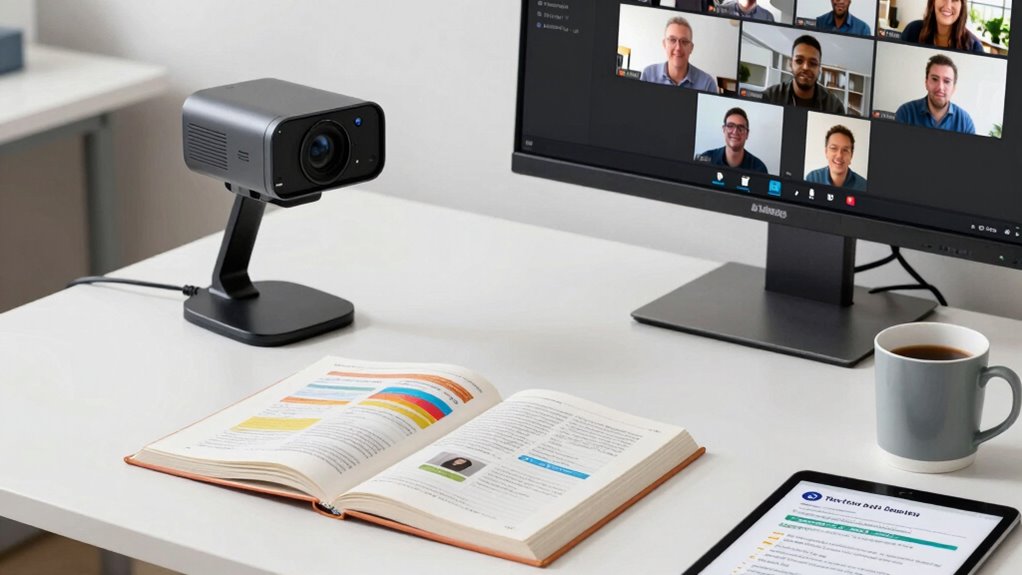
Engage Students With Clear Visual Demonstrations
Visual demonstrations are essential for keeping students engaged and ensuring they understand complex concepts. Using your document camera, you can turn lessons into interactive storytelling, making abstract ideas tangible. When you show a step-by-step process clearly, students stay visually engaged and better grasp the material. Incorporate close-up shots of drawings, objects, or handwritten notes to create a dynamic learning experience. Keep your demonstrations concise and lively, encouraging questions and reactions. This approach transforms passive viewing into active participation, fostering curiosity and understanding. Remember, clear visuals are key: avoid cluttered or blurry images that can confuse students. By emphasizing visual engagement through well-executed demonstrations, you make lessons more memorable and accessible, even in a virtual setting.
Establishing a Routine for Using Your Document Camera Effectively
To get the most out of your document camera during lessons, establishing a consistent routine is essential. Routine consistency helps you stay organized and confident, reducing stress during class. Prepare your workspace and equipment beforehand using effective preparation strategies, so you’re ready to go without delays.
- Set a specific time each day to check your camera and materials, ensuring everything works smoothly.
- Develop a step-by-step process for setting up and positioning the camera quickly.
- Practice your demonstration flow regularly to build familiarity and reduce hesitation.
Frequently Asked Questions
How Can I Improve My Document Camera’s Image Quality?
To improve your document camera’s image quality, start with image calibration—adjust focus, sharpness, and color settings for clarity. Also, optimize your lighting by reducing glare and ensuring even, bright illumination. Use natural light or soft diffused lamps to avoid shadows. Regularly calibrate your camera and tweak lighting until your images are crisp and clear. These steps will make your teaching visuals more professional and easier for your students to see.
What Accessories Enhance the Document Camera Experience?
Imagine you’re wielding a magic wand—accessories like an adjustable stand and a high-quality microphone can transform your document camera experience. To enhance interactivity, add tools for interactive annotation, making lessons more engaging. Lighting optimization accessories, such as adjustable LED lights, guarantee clear visuals even in dim rooms. These accessories help you teach seamlessly, capturing every detail and keeping your audience captivated without feeling overwhelmed.
How Do I Prevent Lag or Latency Issues During Lessons?
To prevent lag or latency during lessons, guarantee your internet connection is stable and high-speed. Use interactive polling to engage students without adding strain on your system. Limit virtual backgrounds if they cause performance issues, as they can increase processing load. Close unnecessary apps, disable high-resolution video if needed, and test your setup beforehand. These steps help keep your lesson smooth, engaging, and free of frustrating lag.
Can I Use a Document Camera With Multiple Devices Simultaneously?
Yes, you can use a document camera with a multi device setup by connecting it to a computer and sharing its feed via screen sharing or a dedicated streaming app. For camera switching, consider using a video switcher or software that allows you to toggle between multiple sources seamlessly. This setup enables you to switch views effortlessly during your lesson, making it easier to manage multiple devices and keep students engaged.
What Are the Best Practices for Managing Student Engagement?
Think of managing student engagement like tending a garden—you must regularly check in and nurture growth. Use interactive polling to keep students active and gather instant feedback, making them feel involved. Ask questions frequently, encourage participation, and respond to student feedback promptly. This approach helps maintain attention, fosters a dynamic learning environment, and makes students feel valued, ensuring your virtual classroom stays lively and productive.
Conclusion
With a well-wielded document camera, your Zoom teaching transforms from stressful to seamless. Master the mechanics, manage the setup, and maintain a mindful routine to minimize mishaps. By blending preparation with patience, you’ll boost engagement and foster understanding. Embrace the ease of effective visuals, empower your education, and enjoy the journey of joyful teaching. Remember, consistent cues and clear communication create confident classrooms, making your Zoom teaching both productive and pleasurable.