
To improve your live demonstrations via a document camera, guarantee your setup is stable with good lighting and clear visuals. Position the camera directly over your materials, keeping it steady and well-focused. Use natural or soft artificial light to avoid glare and shadows. Adjust the camera’s angle and zoom to highlight details effectively. Test everything beforehand to prevent technical issues. Continuing with these tips will help you master a professional, engaging presentation for your remote students.
Key Takeaways
- Test and adjust your camera setup and lighting before each demonstration for optimal clarity.
- Position the camera directly over materials, ensuring steady focus and appropriate zoom for details.
- Use diffuse, soft lighting to minimize shadows and glare, enhancing visibility of materials.
- Keep the camera steady and well-positioned throughout to maintain a clear, professional view.
- Choose a clutter-free background and ensure high-resolution settings for better engagement.
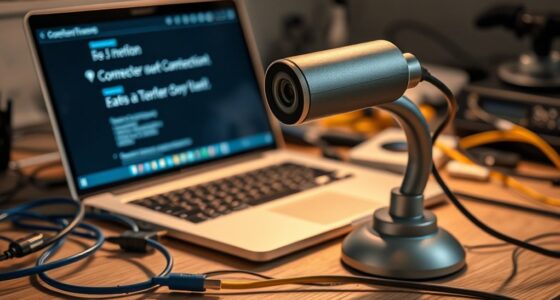
Using a document camera can considerably enhance your remote teaching by providing clear, close-up views of your materials. To achieve this, paying attention to your digital setup and camera positioning is vital. Your digital setup involves more than just plugging in the device; it requires guaranteeing that your camera is connected properly, the software is configured correctly, and your display settings optimize visibility. Start by choosing a reliable connection—USB is common and straightforward, but if your camera supports Wi-Fi or network options, select the most stable connection to avoid lag or disconnections during live demonstrations. Make sure your camera’s resolution is set high enough to capture details clearly, especially if you’re showing small objects, handwriting, or intricate diagrams. Test your setup beforehand to confirm everything appears crisp and well-lit.
Ensure your document camera is properly connected, configured, and well-lit for clear, professional live demonstrations.
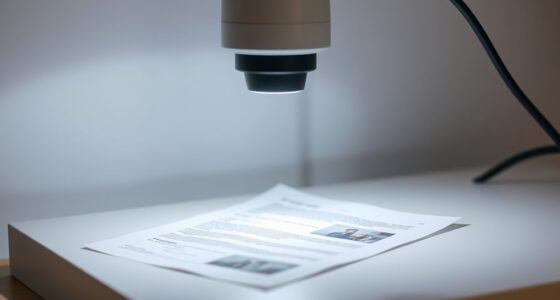
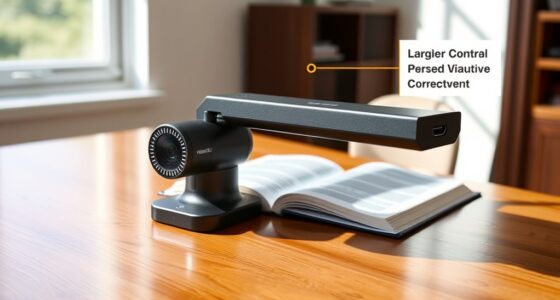
When it comes to camera positioning, think about your workspace layout and how your audience will view your demonstration. You want to position the camera directly over your materials, avoiding angles that distort or obscure details. Use an adjustable stand or mount, enabling you to find the perfect height and angle. Keep the camera steady to prevent shaky visuals, which can distract or frustrate your students. Consider the distance from your materials—get close enough to show details without losing context or cutting off parts of your work. If your camera has a zoom feature, use it to focus on fine points or small objects, but avoid excessive zooming that can reduce image clarity. Additionally, using a good-quality camera can significantly improve the overall clarity and professionalism of your demonstrations.
Lighting plays a vital role in your digital setup. Ensure your workspace is well-lit, ideally with natural light or soft, diffuse artificial lights. Avoid harsh shadows or glare that can obscure details. Position your lights so they don’t create reflections on your materials or cast shadows that make it difficult to see what you’re demonstrating. If your camera has an adjustable focus, take advantage of it to ensure sharp images throughout your demonstration. Additionally, consider the background behind your workspace—using a neutral or uncluttered background helps keep the focus on your materials and reduces distractions.
Finally, regularly check your camera’s positioning and digital setup during your sessions. Small adjustments may be needed as you switch between different materials or demonstrations. Keeping your camera steady and well-positioned guarantees your students can follow along easily. Remember, a well-optimized digital setup paired with strategic camera positioning makes your live demonstrations more engaging, clear, and professional, ultimately elevating your students’ learning experience.

CZUR Shine Ultra Smart Portable Document Scanner, Thin Book Scanner with OCR, USB Document Camera for Desktop/Laptop, Capture Size A3, Compatible with Windows & Mac OS (Not for Android & iOS)
Design and Speed: Work with Windows XP/7/8/10/11 AND macOS 10.13 or later. Not compatible with Android and iOS....
As an affiliate, we earn on qualifying purchases.
Frequently Asked Questions
How Do I Troubleshoot Connectivity Issues During a Live Demonstration?
When troubleshooting connectivity issues during a live demonstration, first check your internet stability by running a speed test and restarting your router if needed. Make certain your device is compatible with the document camera and software you’re using. Close unnecessary applications to free up bandwidth, and try reconnecting or switching to a wired connection if possible. These steps help maintain a smooth demonstration and minimize disruptions.
What Are the Best Lighting Conditions for Clear Document Camera Images?
Good lighting is essential for clear document camera images. Aim for consistent, bright lighting with a well-planned lighting setup, avoiding harsh shadows. Use diffuse light sources or multiple lights to reduce shadows and guarantee even illumination. Research shows that proper lighting can improve image clarity by up to 50%. Position lights at a 45-degree angle to the document to minimize shadow reduction and enhance visibility, making your demonstrations more effective.
How Can I Prevent Glare or Reflections on Glossy Surfaces?
To prevent glare or reflections on glossy surfaces, you should use glare reduction techniques like angling the document camera slightly and adjusting your lighting. Avoid direct overhead lights that cause reflections, and instead, use diffused lighting to minimize glare on reflective surfaces. Additionally, position the camera at an angle that reduces reflections, ensuring your image remains clear and easy to see. These steps help maintain visibility during your live demonstrations.
What Accessories Can Enhance My Document Camera’s Functionality?
You can enhance your document camera’s functionality by adding an extra lens for better zoom and clarity, making your demonstrations more detailed. An anti-glare screen is also essential to reduce reflections and glare, especially on glossy surfaces. These accessories improve image quality and reduce distractions, helping your students focus. With these upgrades, your remote teaching becomes more professional, engaging, and easier to manage, ensuring your demonstrations are clear and impactful.
How Do I Manage Audio Issues During Live Demonstrations?
To manage audio issues during live demonstrations, first focus on your audio setup by choosing a good quality microphone. Confirm proper microphone placement—position it close to your mouth but away from noise sources—to capture clear sound. Test your audio beforehand to identify and fix any issues. Adjust volume levels as needed, and consider using noise-canceling microphones or software to improve audio clarity, guaranteeing your students hear you clearly throughout your demonstration.

Epson Workforce ES-580W Wireless Color Duplex Tax Receipt & Desktop Document Scanner for PC and Mac with 100-sheet Auto Feeder (ADF), Intuitive 4.3' Touchscreen
EFFORTLESS WIRELESS SCANNING – With a 4.3" touchscreen and wireless connectivity, this high-speed scanner sends scans straight to...
As an affiliate, we earn on qualifying purchases.
Conclusion
With a steady hand and a clear view through your document camera, you bring your lessons to life, like a painter revealing vibrant strokes on a canvas. As students watch your demonstrations unfold in crisp detail, you create an engaging, immersive experience that bridges the distance. Remember, your confident setup transforms a simple camera into a window into your classroom, making learning feel as close and vivid as if they were right there with you.

Epson WorkForce ES-50 Portable Sheet-Fed Document Scanner for PC and Mac
Fastest and lightest mobile single sheet fed document scanner in its class(1) small, portable scanner ideal for easy,...
As an affiliate, we earn on qualifying purchases.

Brother DS-640 Compact Mobile Document Scanner, (Model: DS640)
FAST SPEEDS - Scans color and black and white documents a blazing speed up to 16ppm (1). Color...
As an affiliate, we earn on qualifying purchases.