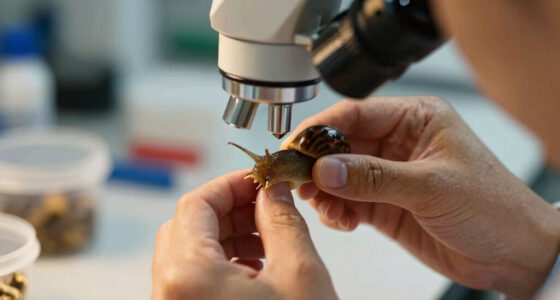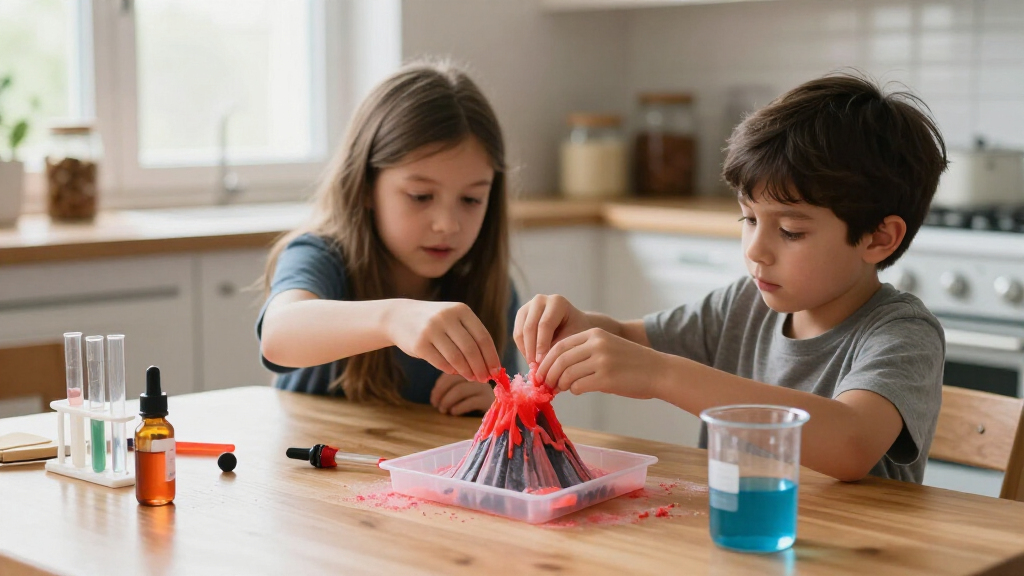
This guide walks you through the complete process of running a science experiment kit with a child: choosing a kit that matches their age and interests, preparing a workspace, working through the experiments step by step, and talking about the results so the activity actually teaches something. It is written for parents, grandparents, babysitters, and teachers who want a hands-on science session that finishes with a working result rather than a spilled mess and a frustrated kid. No science background is required — every kit worth buying explains the science for you. Expect the first session to take one to two hours, including setup and cleanup. This is a beginner-level task: if you can follow a recipe and read an instruction manual, you can do this.

Prime made for students and young adults
- Fast, free delivery for dorm and study essentials
- Prime Video and Amazon Music included
- Member-only deals
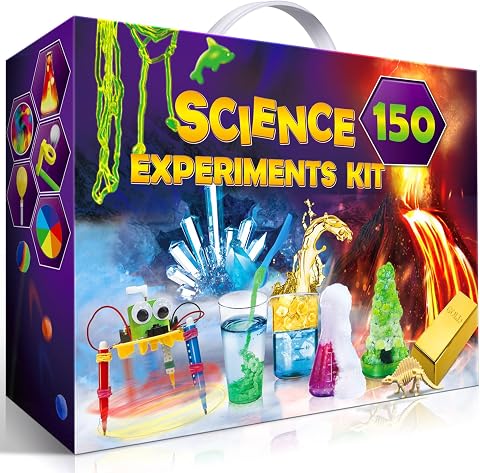
UNGLINGA 150 Experiments Science Kit for Kids
- ✔ Brand: UNGLINGA
- ✔ Number of Experiments: 150
- ✔ Recommended Age: 8 years and up
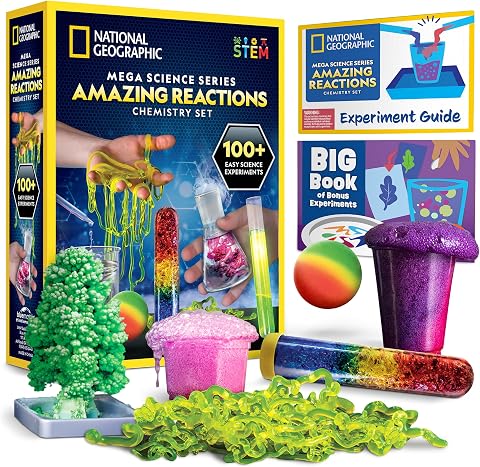
National Geographic Amazing Chemistry Set
- ✔ Brand: Blue Marble
- ✔ Sub Brand: National Geographic
- ✔ Age Range: 8 years and up

National Geographic Science Magic Kit
- ✔ Brand: Blue Marble / National Geographic
- ✔ Age Range: 8 years and up (designed for 8-12)
- ✔ Experiments: 20 magic experiments fully included, 85+ bonus with household items
Difficulty: Beginner | Time: 1-2 hours per session (plus 30-60 minutes for kit selection and setup)
What You’ll Need
Tools & Materials:
- A science experiment kit matched to the child’s age (chemistry set, crystal growing kit, volcano kit, electronics kit, or similar)
- A flat, wipeable work surface (kitchen table, counter, or protected desk)
- Towels or paper towels for spills
- A bowl or basin for waste and used materials
- Access to a sink and water
- Safety glasses if the kit includes them (or separate child-sized safety glasses)
- Optional: a phone or camera to record the results
- Optional: a notebook and pencil for the child to record observations
Knowledge:
- Ability to read and follow written step-by-step instructions
- Basic kitchen safety habits (handling warm water, keeping food and chemicals separate)
- No prior science knowledge needed — kits designed for kids explain the concepts
Check the kit box for an age rating and a list of included chemicals or small parts before you buy or open it. If the kit contains powders, dyes, or batteries, confirm the child is old enough for those components — most kits state a minimum age such as 8+ or 10+ on the packaging. Verify the kit is complete when you open it: nothing slows an experiment down more than discovering a missing measuring cup halfway through.
UNGLINGA 150 Experiments Science Kit for Kids
Of the three kits we compared, the UNGLINGA 150 Experiments Science Kit offers the broadest scientific scope by a wide margin. Rather than concentrating on chemistry alone, it spreads its 150 experiments across earth science, surface tension, chemistry, and physics, which matters if you don’t yet know which branch of science will captivate your child. Where the National Geographic chemistry set goes deep on reactions, UNGLINGA goes wide — and for most kids aged 8 and up, that breadth keeps the kit fresh for months rather than weeks.Two inclusions set it apart in this lineup. First, the safety goggles and lab tools give kids the feeling of working like a real scientist, an experience the magic-focused National Geographic kit doesn’t match. Second, the illustrated step-by-step manual is noticeably more detailed than the bonus booklets in either National Geographic kit, which matters for independent play. The honest tradeoff: some experiments still require household items, and the age recommendation means younger siblings will need an adult’s help. Compared with the Amazing Chemistry Set, you sacrifice some tool quality, but you gain variety and long-term value that we think most families will prefer.
Pros:
- Largest experiment count in this lineup at 150, spanning chemistry, physics, earth science, and more
- Includes safety goggles and real lab tools for an authentic scientist experience
- Well-illustrated step-by-step manual that kids can follow with minimal adult help
- Broad topic coverage keeps the kit engaging far longer than single-subject alternatives
Cons:
- Some experiments require additional household items not included in the box
- Designed for ages 8 and up, so younger children need close adult supervision
Best for: Kids aged 8 and up who want variety across multiple science topics and parents who want a kit that lasts beyond a single weekend.
Not ideal for: Families seeking a focused, rigorous chemistry experience with professional-grade lab equipment.
Bottom line: The most complete package for curious kids — variety, tools, and safety gear at a level neither National Geographic kit fully matches.
“The most complete package for curious kids — variety, tools, and safety gear at a level neither National Geographic kit fully matches.”
National Geographic Amazing Chemistry Set
If UNGLINGA is the generalist, the National Geographic Amazing Chemistry Set is the specialist — and a compelling one. It provides materials for 15 core experiments with genuinely dramatic results: bubbling color-changing solutions, glowing test tubes, crystal growing, and making a bouncy ball. These are the kinds of experiments that produce audible reactions, and they teach real chemical principles rather than simple mixing.Its standout strength is the real scientific equipment — test tubes, beakers, and pipettes that feel like proper labware rather than toys. This is where it clearly outclasses the UNGLINGA kit, whose tools are more basic. The bonus guide with 85 additional experiments extends the value, but be realistic about the fine print: those extra activities rely entirely on household items, so the out-of-box experience is smaller than the 100+ figure suggests. Adult supervision is essential for the chemical reactions. This pick makes the most sense for a child who has already shown sustained interest in chemistry and will appreciate authentic equipment over sheer quantity.
Pros:
- Real scientific tools including test tubes, beakers, and pipettes
- Dramatic, memorable experiments like color-changing solutions and crystal growing
- Bonus guide adds 85 extra experiments using common household items
- Award-winning brand with U.S.-based customer support
Cons:
- Only 15 experiments include provided materials; the rest require household supplies
- Chemical reactions require adult supervision
- Chemistry-only focus limits variety compared with UNGLINGA’s multi-topic approach
Best for: Kids ages 8-12 who are specifically drawn to chemistry and want real lab tools and dramatic reactions.
Not ideal for: Children who want maximum out-of-box experiment variety without supplementing materials.
Bottom line: The deepest, most authentic chemistry experience of the three — choose it over UNGLINGA when focus matters more than breadth.
“The deepest, most authentic chemistry experience of the three — choose it over UNGLINGA when focus matters more than breadth.”
National Geographic Science Magic Kit
Not every child is drawn to lab work, and that’s exactly the gap the National Geographic Science Magic Kit fills. Unlike the other two kits, which present experiments as science first, this one leads with magic tricks that secretly teach scientific principles. Kids learn surface tension, air pressure, and chemical reactions while performing feats for family members — a completely different motivation model, and often a more effective one for kids who resist structured learning.Its practical advantage over both competitors is immediacy: everything needed for the 20 core magic experiments is included in the box, whereas UNGLINGA and the Amazing Chemistry Set both require household supplementation to reach their advertised totals. The bonus booklet adds 85+ further experiments using household items, mirroring the chemistry set’s structure. The tradeoff is depth — the science here is lighter and more demonstration-oriented than the genuine lab work in the Amazing Chemistry Set, and the 8-12 age targeting means older kids may find the framing childish. This option stands out for engagement rather than education density, and we’d choose it when the primary goal is sparking interest.
Pros:
- Everything needed for 20 core experiments is included for immediate out-of-box use
- Magic framing makes STEM concepts approachable for kids who resist traditional science kits
- Bonus booklet extends play with 85+ additional experiments
- Award-winning brand from a Toy of the Year-winning manufacturer
Cons:
- Science content is lighter and more demonstration-based than the chemistry-focused alternatives
- Explicitly designed for ages 8-12, limiting appeal for older children
Best for: Kids aged 8-12 who are skeptical of traditional science activities but love performing and showing off tricks.
Not ideal for: Older kids or families wanting rigorous, tool-based chemistry experiments.
Bottom line: The smart pick for winning over science-averse kids — engagement-first design with real STEM learning hidden inside the tricks.
“The smart pick for winning over science-averse kids — engagement-first design with real STEM learning hidden inside the tricks.”
As an Amazon Associate we earn from qualifying purchases.
Before You Start
Do three things before the first experiment. First, read the entire instruction manual yourself, start to finish, while the child is not in the room. You want to know which experiments need to sit overnight, which need hot water, and which use the entire supply of a powder so you can sequence the session sensibly. Second, check the safety warnings page and gather any household items the kit says are required but not included — many kits need vinegar, baking soda, cooking oil, or batteries that are not in the box. Third, set up the workspace on a surface that can get wet and stained. Food coloring and crystal-growing solutions can permanently mark wood tables and countertops, so put down a plastic tablecloth, old newspapers, or a cutting board. Work near a sink if at all possible. One adult must supervise any kit with chemicals, heat, or small parts — this is stated on the box for good reason.
Step-by-Step Instructions
Step 1: Choose a kit that matches the child’s age and interest
Match the kit to the child’s stated age range on the box and to something they already like. Kids who like building things respond well to electronics or circuit kits; kids who like messy, dramatic results respond well to volcano and chemistry kits; kids who collect rocks respond well to crystal growing or geode kits. For children under 8, choose kits labeled for ages 6-8 with large parts and no powders requiring precise measurement. For ages 8-12, standard chemistry, crystal, and slime kits work well. If the child has never done a kit before, pick one with several small experiments rather than one large project — short wins build confidence.
Tip:Avoid kits with tiny print instructions or experiments that take multiple days as a first kit. Check reviews specifically for complaints about missing parts or instructions that skip steps — these are the two most common failure points.
Check: The kit box states an age range that includes the child’s age, and at least half the experiments sound like something the child would want to try.
Step 2: Inventory the kit contents against the parts list
Open the box, lay every component on the table, and tick each item off the parts list in the manual. Count test tubes, check that chemical packets are sealed, and confirm measuring tools are present. If anything is missing, contact the manufacturer through the website or phone number on the box before starting — most will ship replacements for free. Put household items you gathered (vinegar, batteries, paper towels) on the table now so you do not leave mid-experiment.
Tip:Take a photo of the laid-out parts. If a piece rolls off the table later, you will know exactly what is missing by comparing against the photo.
Check: Every item on the parts list is accounted for and sits within reach of the workspace.
Step 3: Prepare the workspace and safety setup
Clear the work surface completely, cover it with newspaper or a plastic cloth, and set the kit materials on one side with an empty workspace in the middle. Fill a cup with water if the experiments need it, place towels within arm’s reach, and put the waste bowl on the table. Have the child wash their hands and put on safety glasses if the kit includes them. Tie back long hair and push up loose sleeves. Tell the child one rule before starting: no tasting, touching your face, or grabbing materials without asking — the same rule real labs use.
Check: The surface is protected, towels and water are within reach, and the child can state the safety rule back to you.
Step 4: Pick the first experiment and read its steps aloud together
Choose the simplest experiment in the manual as the first one — this is usually listed first or marked as beginner level. Read each step aloud with the child before touching any materials, and point to the pictures in the manual. Ask the child to predict what will happen and have them say or write the prediction down. This takes thirty seconds and turns the activity from a demonstration into an actual experiment.
Tip:Never skip ahead in a multi-step experiment because the child is excited. Most kit failures happen when steps are done out of order — for example, adding water before a powder, or mixing in the wrong container.
Check: Both of you know how many steps the experiment has, and the child has made a prediction before any materials are opened.
Step 5: Run the experiment with the child doing the hands-on work
Hand the materials to the child and let them pour, measure, mix, and assemble while you read each step aloud. Handle only what the child physically cannot do — cutting with a knife, using very hot water, or wiring batteries in some kits. Narrate what you observe as it happens: “Look, the color changed when you added the second liquid — why do you think that happened?” Measure precisely when the instructions give amounts; guessing at quantities is the single most common reason kit experiments fail.
Tip:Supervise without hovering. If the child makes a small mess or pours slightly unevenly, let it go unless it breaks the experiment. The goal is engagement, not perfection.
Check: The experiment produces the result the manual describes — fizzing, a color change, a glowing circuit, or growing crystals — and the child performed the steps themselves.
Step 6: Talk about the result and record it
Immediately after the experiment finishes, ask the child three questions: What did you expect to happen? What actually happened? What would you change next time? Look up the explanation section in the manual together and read it aloud. Have the child draw the result or write one sentence about it in a notebook, and take a photo of the result. This five-minute conversation is where the actual learning happens — the experiment is just the delivery method.
Check: The child can explain, in their own words, one thing about why the experiment worked.
Step 7: Clean up and store the kit properly
Pour liquids into the sink with running water (unless the manual says otherwise — some solutions should not go down the drain), rinse all containers, and dispose of used powders and mixtures in the trash. Wipe the work surface, have the child wash their hands thoroughly, and dry all kit components completely before returning them to the box. Count the parts back against your photo or the parts list, and seal remaining chemical packets with tape or a clip. Store the kit in a cool, dry place out of reach of younger siblings.
Tip:Damp components left in a closed box grow mold and ruin remaining test strips and powders. Dry everything fully, even if it means leaving pieces on a towel overnight.
Check: The workspace is clean, hands are washed, all parts are dry and back in the box, and the kit is stored out of reach of small children.
Common Mistakes to Avoid
- Buying a kit rated well above the child’s age — Follow the age rating on the box strictly, not loosely. An advanced kit done by a younger child usually ends in frustration and wasted materials. When in doubt, buy down an age level.
- Skipping the full read-through of the manual before starting — Read the entire manual alone before the session. You need to know which experiments require overnight waits, hot water, or the full supply of a reagent so you can plan the order and manage expectations.
- Letting the child measure by eye instead of following quantities — Insist on using the kit’s measuring tools for every quantity given. Chemistry-style experiments are sensitive to proportions, and doubling an ingredient usually causes a failed or messy result rather than a bigger one.
- Doing all the experiments in one sitting — Pace the kit across several sessions. Running five experiments back-to-back exhausts the child’s attention and burns through materials. One or two experiments per session keeps enthusiasm high for weeks.
Troubleshooting
Problem: An experiment produces no visible result
Solution: Check three things in order: were the quantities measured exactly, were the chemicals fresh (old opened powders absorb moisture and stop reacting), and was the water temperature correct? Many manuals specify warm water — cool water slows or prevents reactions. Repeat the experiment once with corrected variables before assuming a failure.
Problem: Crystals fail to grow after the waiting period
Solution: Crystal growing fails most often because the solution was not fully saturated or was disturbed while cooling. Reheat the solution, dissolve more of the crystal powder until no more will dissolve, set it somewhere it will not be moved or bumped, and wait the full time stated — usually 3 to 7 days. A dusty shelf or a sibling’s touch ruins more crystal kits than anything else.
Problem: The kit is missing a part
Solution: Do not improvise with kitchen items that look similar, especially measuring spoons and chemical packets. Contact the manufacturer using the contact details on the box — replacements are usually sent free. Meanwhile, run a different experiment from the kit that does not need the missing part.
Problem: The child loses interest halfway through
Solution: Stop at a natural break rather than pushing to finish. Clean up, store the kit, and return to it another day with a different experiment. Pick the most dramatic experiment in the kit for the next session — a volcano eruption or color-changing reaction reliably rebuilds interest.
What Success Looks Like
The session is a success when four things are true. The child completed at least one experiment with their own hands and saw the result the manual described. They can explain one thing about why it worked in their own words. The workspace is clean, all kit parts are dry and stored, and remaining chemicals are sealed. And, most tellingly, the child asks to do another experiment — sustained curiosity is the real measure that the kit did its job.
Next Steps
Schedule the next kit session within a week while interest is high, and let the child choose which experiment comes next. Start an experiment notebook: each session, have the child add a drawing, a prediction, and one sentence about the result — after five sessions you will have a genuine lab log. When the kit runs low on consumables, check whether the manufacturer sells refill packs before buying an entirely new kit. As the child masters the guided experiments, encourage a variation: change one variable such as water temperature or a quantity, predict the outcome, and test it. That habit — predicting, testing, and comparing — is the actual skill the kits exist to teach. If the child is consistently finishing kits quickly and asking harder questions, move up to a more advanced kit in the same subject area rather than switching topics.
Frequently Asked Questions
What age is right to start science experiment kits?
Most children can start simple kits around age 6, typically ones involving mixing safe household substances or large magnet and building components. Kits with chemical powders, precise measuring, or small parts generally start at age 8. Always follow the age rating on the box — it reflects both safety testing and the manual’s reading level.
Are the chemicals in kids’ science kits safe?
Reputable kits use food-grade or low-hazard substances such as baking soda, citric acid, and food coloring. They are safe with adult supervision, safety glasses, no tasting, and hand washing afterward. Never mix kit chemicals with household cleaning products, and keep kits away from children below the stated age range.
Can I replace kit chemicals with household supplies?
For basic volcano and fizzing experiments, yes — baking soda and vinegar work identically. For crystal growing and color-change chemistry, no; those depend on specific compounds like alum or red cabbage indicator powder. Use the manufacturer’s refill packs for anything beyond simple acid-base reactions.
How many experiments should we do in one session?
One or two. A single well-executed experiment with a real discussion beats four rushed ones. Kit manuals are designed to stretch across multiple sessions, and pacing the experiments keeps the child asking to come back to the kit.
What if an experiment fails — is the kit wasted?
No. Most failed experiments can be repeated once quantities, chemical freshness, and water temperature are corrected, and the failure itself is a teaching moment. Ask the child what went wrong and what to change — real scientists fail far more often than they succeed, and learning to retry is part of the lesson.
Halloween Picks
halloween
As an affiliate, we earn on qualifying purchases.