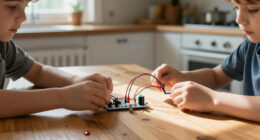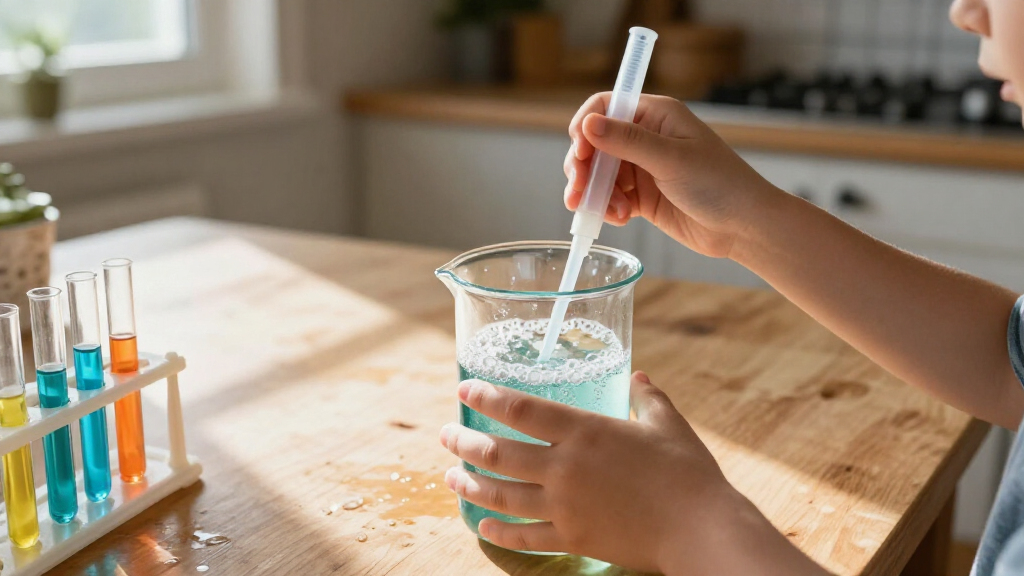

Choose a science kit that matches a child’s age, interests, and ability to follow directions, then prepare and complete one activity together. This guide is for caregivers and educators who want a practical way to turn a kit into a safe, hands-on learning session. No science background is required. Allow about 30-60 minutes to compare options and prepare; follow the kit’s stated duration for the activity itself.

Prime made for students and young adults
- Fast, free delivery for dorm and study essentials
- Prime Video and Amazon Music included
- Member-only deals
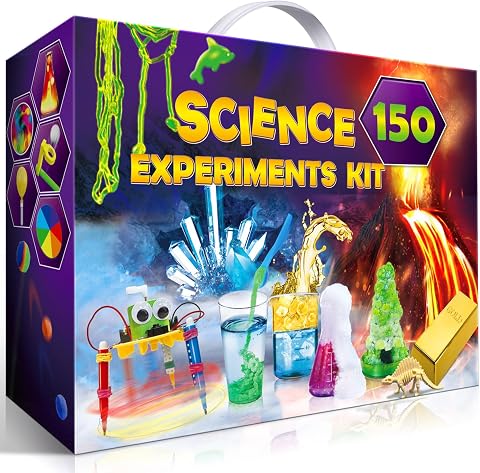
UNGLINGA 150 Experiments Science Kits for Kids Chemistry Lab S.T.E.M Toys
- ✔ Stated activity count: 150 experiments
- ✔ Topics: Earth science, surface tension, chemistry, physics, and more
- ✔ Instruction format: Illustrated, step-by-step manual

Doctor Jupiter Preschool Science Kit for Kids Ages 3–5
- ✔ Age guidance: Ages 3+; positioned for ages 3–5
- ✔ Stated activity count: 100+ activities
- ✔ Activity themes: Colors, bubbles, water, motion, sound, and simple reactions

National Geographic Science Magic Kit with 100+ Experiments for Kids 8–12
- ✔ Age guidance: Ages 8–12
- ✔ Included magic experiments: 20
- ✔ Bonus activities: 85+ additional experiments using common household items
Difficulty: Beginner | Time: 30-60 minutes to choose and prepare; activity time varies by kit
What You’ll Need
Tools & Materials:
- A science kit with its instructions and required components
- A clear, stable work surface
- The household supplies listed in the kit instructions
- Paper and a pencil for recording a question, prediction, or observation
- Protective equipment specified by the kit, such as safety glasses or gloves
Knowledge:
- Ability to read and follow the kit’s age rating and safety directions
- Willingness to supervise children and help with steps beyond their abilities
Check the kit’s box and instructions for required household supplies, activity duration, age guidance, and safety warnings before opening materials. Some kits include small parts or substances that require close adult supervision. Keep food and drinks away from the work area, and ask the child’s caregiver about allergies or sensitivities before choosing a kit.
UNGLINGA 150 Experiments Science Kits for Kids Chemistry Lab S.T.E.M Toys
For families who want one kit to move between different kinds of science, UNGLINGA’s 150-experiment format has the widest stated subject mix in this roundup. Activities cover chemistry, physics, earth science, and surface tension, so children can encounter several areas rather than staying with one theme. That breadth gives it the edge over National Geographic’s more performance-oriented science magic and Doctor Jupiter’s preschool-level sensory focus.The illustrated, step-by-step manual is an important part of the educational case: demonstrations are more useful when children can follow a sequence and connect what they observe with a basic lesson. The kit includes child-friendly tools and goggles, while the listing says many projects also call for ordinary household items. Families should therefore expect to gather some materials and help prepare activities instead of assuming everything needed is in the box.This pick makes the most sense when an adult can share science time with a curious child who wants variety. Compared with Doctor Jupiter, its subject range is broader but less explicitly tailored to preschool learners. Compared with National Geographic, it offers a more general science-lab identity rather than using magic tricks to frame the concepts. The tradeoff is that a large activity collection can mean more setup and selection for caregivers; the listing also does not specify an age range, so families should check activity guidance before choosing it for a younger child.
Pros:
- Covers several science areas rather than focusing on one activity style.
- Includes an illustrated, step-by-step experiment manual.
- Provides science tools and goggles for a lab-themed experience.
- Many projects use common household materials, which can extend activity options.
Cons:
- Some experiments require families to find additional household materials.
- The supplied description does not state a specific age range.
- The broad activity count may require adult help choosing and organizing projects.
Best for: Families seeking a varied set of chemistry, physics, earth science, and surface-tension activities to explore together.
Not ideal for: Caregivers looking for a kit explicitly designed for preschoolers, or a fully self-contained set that avoids sourcing household materials.
Bottom line: We rank UNGLINGA first for its broad science coverage and guided activity format, provided an adult can help with preparation and age-appropriate selection.
“We rank UNGLINGA first for its broad science coverage and guided activity format, provided an adult can help with preparation and age-appropriate selection.”
Doctor Jupiter Preschool Science Kit for Kids Ages 3–5
Doctor Jupiter’s Preschool Science Kit is the clearest age match in this group: it is designed for children ages 3 and up, with activities around color, bubbles, water, motion, sound, and simple reactions. Mixing, pouring, fizzing, touching, and observing give young children concrete ways to notice cause and effect. That makes this kit a more natural starting point for preschoolers than UNGLINGA, whose supplied description does not give an age range, or National Geographic, which lists ages 8–12.The kit includes a beaker, flask, cups, stirring sticks, color-mixing tray, funnel, spray bottle, bubble wand, and other activity pieces. Illustrated instructions and online activity access can help caregivers guide the experience, while the sensory format gives children something to observe and talk about instead of relying on explanations alone. Its subject range is listed as biology, chemistry, earth science, and physics, though the activities described are framed as introductory play rather than a deep dive into any one topic.Choose it for a young learner who benefits from short, hands-on discovery alongside an adult. Its preschool emphasis is also its main limitation: older children ready for a wider variety of experiments or more elaborate explanations may find National Geographic’s magic demonstrations or UNGLINGA’s broader activity mix more engaging. The product listing describes the materials as food-grade and activities as designed for safety, but families should still follow the manual’s age guidance and supervise children during experiments.
Pros:
- Explicitly designed for children ages 3 and up.
- Uses familiar actions such as pouring, mixing, and observing.
- Includes a variety of activity tools, from a funnel to a bubble wand.
- Offers illustrated instructions and online activity access.
Cons:
- Its simple, play-based approach may not hold the interest of older children.
- The activity descriptions emphasize introductory exploration rather than detailed scientific study.
- Adult guidance remains important for preschool activities.
Best for: Preschool children ages 3–5 who enjoy sensory activities and learning through guided play with a caregiver.
Not ideal for: Older children seeking more challenging experiments, or families who want an advanced, topic-by-topic science course.
Bottom line: We recommend Doctor Jupiter for preschoolers who are ready to explore basic science through supervised sensory play.
“We recommend Doctor Jupiter for preschoolers who are ready to explore basic science through supervised sensory play.”
National Geographic Science Magic Kit with 100+ Experiments for Kids 8–12
The National Geographic Science Magic Kit is built around a different kind of learning hook: science presented as a magic trick. Its 20 supplied experiments include demonstrations such as bending metal with water, making a test tube seem to vanish, and floating a coin. The wand and white gloves help children perform these effects for an audience, while the illustrated guide explains the science and adds techniques and facts. For a child who likes to show how something works, this format has a clearer performance angle than either UNGLINGA’s general lab set or Doctor Jupiter’s preschool activities.The listing also includes a bonus guide with 85+ additional household-material experiments. That gives the kit a longer runway beyond the supplied magic activities, though it shifts some preparation to the family. Its stated age guidance is 8–12, which sets it apart from Doctor Jupiter’s preschool focus and makes it a better fit for children ready to follow demonstrations and discuss the explanation afterward.We place it third overall because its distinctive magic theme is less broadly suited to children looking for a conventional survey of science topics. UNGLINGA names a wider range of subject areas, while Doctor Jupiter makes its early-childhood audience explicit. The National Geographic kit is compelling for an older child who enjoys performance, but families should note the difference between the 20 experiments described as included and the larger bonus collection that relies on common household items. It is a focused, engaging route into science rather than the most straightforward all-purpose kit.
Pros:
- Combines science demonstrations with an entertaining magic-show format.
- Guide includes illustrated instructions and explanations of the science.
- Includes a wand and white gloves for presenting experiments.
- Bonus guide adds 85+ activities using common household items.
Cons:
- The supplied kit is described as including 20 magic experiments, fewer than the headline total may suggest.
- Many bonus activities depend on household materials.
- Its performance theme is more specialized than the broad subject mix in UNGLINGA.
Best for: Children ages 8–12 who enjoy performing demonstrations and want to explain the science behind surprising effects.
Not ideal for: Preschoolers, children who dislike performing, or buyers seeking a kit centered on a broad range of conventional lab topics.
Bottom line: We favor this kit for older children who learn through demonstrations and enjoy putting on a science show, while recognizing its narrower theme.
“We favor this kit for older children who learn through demonstrations and enjoy putting on a science show, while recognizing its narrower theme.”
As an Amazon Associate we earn from qualifying purchases.
Before You Start
Read the full activity instructions before inviting the child to begin. Check for small parts, sharp tools, heat, electrical components, powders, liquids, or other materials that call for adult handling. Follow the manufacturer’s age rating and safety directions. Do not substitute household materials for listed components unless the instructions say substitutions are suitable. Choose a well-lit area where the activity can remain undisturbed for its full duration.
Step-by-Step Instructions
Step 1: Choose a kit that fits the child
Compare the age range, subject, activity length, and required adult help on each kit. Pick a topic the child is curious about, such as plants, magnets, rocks, simple machines, or the human body. Check whether the activities match the child’s reading, fine-motor, and attention skills. An age rating is a starting point; read the safety notes and decide whether the required supervision suits your setting.
Tip:Choose a kit with several activities if the child wants to explore a topic over more than one session. For a first experiment, a short activity with a clear result can be easier to follow than a kit with many stages.
Check: You have identified a kit whose topic interests the child and whose directions, materials, and safety requirements fit the child and available adult support.
Step 2: Check the contents and activity requirements
Open the package in the work area and compare its contents with the inventory in the instructions. Select one activity and list every household supply it calls for. Check the package for damaged containers, missing parts, leaks, or unclear directions. Contact the manufacturer or seller about missing or damaged components before starting an activity that depends on them.
Tip:Some kits include enough material for one trial. Read the quantities carefully before planning repeats or inviting a group to participate.
Check: The chosen activity has its listed components, and you have gathered the additional supplies it requires.
Step 3: Set up a safe workspace
Clear a stable surface and cover it if the activity could spill or stain. Put only the materials for the selected activity within reach. Move food, drinks, pets, and unrelated objects away from the work area. Place safety equipment where the adult can access it, and keep the instructions open to the relevant activity. Follow any directions about ventilation, cleanup, or handwashing.
Tip:Have a sink, paper towels, or a waste container nearby when the instructions call for them. Do not pour materials down a drain unless the kit says that is safe.
Check: The work area is clear, the needed materials are present, and the safety directions can be followed without leaving the child unsupervised.
Step 4: Read the activity together
Read the selected activity from start to finish with the child. Point out the goal, the order of the steps, and any warning symbols. Explain unfamiliar words in plain language, then ask the child to describe what they will do first. Identify steps the adult must perform, such as measuring, cutting, heating, or handling a material restricted by the instructions.
Tip:Pause before opening sealed materials or mixing anything. Starting early can make it harder to follow an order-sensitive activity.
Check: You and the child can explain the activity’s goal, its step order, and which parts need adult handling.
Step 5: Ask a question and record a prediction
Turn the activity’s goal into a question the child can investigate. Ask what they think will happen and why. Write or draw the prediction on paper before beginning. Keep the prediction open-ended: the aim is to compare it with what happens, not to guess a correct answer in advance.
Tip:If the kit does not suggest a question, use one that matches its activity, such as “Which object will a magnet attract?” Avoid changing the activity in a way that conflicts with its safety directions.
Check: The child has stated or drawn a prediction that can be compared with the result.
Step 6: Complete one activity by following its directions
Guide the child through the printed steps in order. Let them handle age-appropriate tasks, such as sorting, observing, or recording, while you perform any steps the instructions reserve for an adult. Measure the amounts as directed and use only the listed materials. Pause if either of you is unsure what a direction means; reread it before continuing.
Tip:Do not taste kit materials or mix substances from different activities. Stop if a container is damaged, a spill creates a hazard, or the activity behaves in a way the instructions identify as unsafe.
Check: The activity was completed in the stated order, with the specified materials and adult supervision.
Step 7: Observe and compare the result
Invite the child to describe what they can see, hear, or measure. Record the result using the method in the instructions, such as a drawing, count, measurement, or short note. Compare the observation with the prediction and ask what was similar or different. If the kit asks for waiting, leave the setup undisturbed for the stated time and check it as directed.
Tip:Help the child separate observations from guesses. “The paper moved toward the magnet” describes an observation; “the magnet wants the paper” is an interpretation to discuss.
Check: You have a recorded observation and can describe how it compares with the child’s prediction.
Step 8: Clean up and store the kit
Follow the kit’s cleanup and disposal directions. Have the child wash their hands if the instructions call for it, and wipe the work area as appropriate. Return reusable components to their labeled storage places, keep small parts away from young children, and store remaining materials as the manufacturer directs. Write down any missing supplies or questions before putting the instructions away.
Tip:Do not keep a mixture or specimen for later unless the directions say how to store it safely.
Check: The work area is clean, used materials are handled as directed, and reusable kit parts are stored safely.
Common Mistakes to Avoid
- Choosing a kit from its age label alone. — Read the activity directions and safety notes, then compare them with the child’s skills and the adult supervision available.
- Starting before checking the supplies. — Inventory the kit and gather every listed household item before beginning the activity.
- Skipping steps or changing quantities to make an activity faster. — Follow the printed order and measurements; an experiment may depend on them for a meaningful result.
- Giving the child materials or tools that require adult handling. — Read the safety directions first, supervise throughout, and perform any restricted steps yourself.
Troubleshooting
Problem: A required part or household supply is missing.
Solution: Check the inventory and activity directions again. Get the specified supply or contact the seller about a missing kit component. Choose another complete activity in the kit while you wait.
Problem: The result looks different from the one pictured.
Solution: Compare the steps, quantities, timing, and conditions with the instructions. Record what happened, and repeat only if the directions allow it and you have enough materials. A different result can still support observation and discussion.
Problem: The child loses interest before the activity ends.
Solution: Pause at a safe stopping point if the instructions permit it. Offer a small role, such as drawing the setup or reading the next step, and resume later only if the activity can be stored as directed.
Problem: A direction or safety warning is unclear.
Solution: Stop before carrying out that step. Reread the full instruction and check the manufacturer’s guidance. Do not guess about handling, mixing, heating, or disposal.
What Success Looks Like
The task is complete when the child has taken part in a kit activity that fits their age and abilities, followed the directions with suitable supervision, and recorded or described an observation. They should be able to compare what happened with their prediction and explain one thing they noticed. The activity does not need to produce the pictured result for the session to be useful; accurate observations and safe cleanup are also signs of success.
Next Steps
Ask the child what they would like to investigate next, and use their observation to choose a follow-up activity from the kit or a related topic. Keep the notes with the instructions so the child can compare results across sessions. Before each new activity, check its materials and safety directions again. Replace depleted supplies only with components the manufacturer identifies as compatible. Set aside damaged parts or unclear instructions until you can get guidance from the manufacturer.
Frequently Asked Questions
How do I pick a science kit for a child who is new to experiments?
Choose a kit with a topic the child likes, short directions, and an activity with a visible or measurable result. Check the safety notes and adult help required, then compare those demands with the child’s skills. A beginner does not need a kit labeled for the youngest age if its subject does not interest them.
Should I tell the child what result to expect?
Let the child make a prediction before the activity, then compare it with the observation afterward. You can explain the science once they have described what happened. This keeps the activity focused on noticing and asking questions instead of trying to match a picture.
Can I replace a missing kit material with something from home?
Use a substitute only when the instructions or manufacturer say it is suitable. Similar-looking materials can behave differently or create a safety issue. If a required part is missing, pause that activity and contact the seller or select another complete one.
What should I do if the experiment does not work?
Check the order, measurements, timing, and conditions against the instructions, then write down what happened. If the directions allow a repeat and enough materials remain, try again while changing only what the instructions permit. If the outcome remains different, discuss possible reasons rather than forcing a result.
How can I tell whether the child learned something?
Ask the child to describe what they observed, compare it with their prediction, and name one question they still have. A drawing or short note can show what they noticed. They do not need to memorize a technical explanation for the activity to build useful observation skills.