
To create a great yearbook, involve students in picking photos, captions, and themes to boost ownership and authenticity. Use user-friendly design software with templates and collaborative tools to simplify layout tasks. Practice exploring features early on to build confidence, which leads to smoother collaboration. Focus on consistency by setting deadlines and using templates to manage the project. Keep these tips in mind to make your yearbook both memorable and well-organized—more helpful ideas await as you continue.
Key Takeaways
- Involve students in photo submissions, captions, and theme ideas to foster ownership and authentic representation.
- Use user-friendly design software with templates and collaborative tools for efficient yearbook creation.
- Practice with the chosen software early by creating sample pages to understand features and troubleshoot.
- Incorporate student teamwork to develop layout, storytelling, and color coordination skills.
- Maintain consistency using templates, set deadlines, and organize content to ensure a smooth, collaborative process.

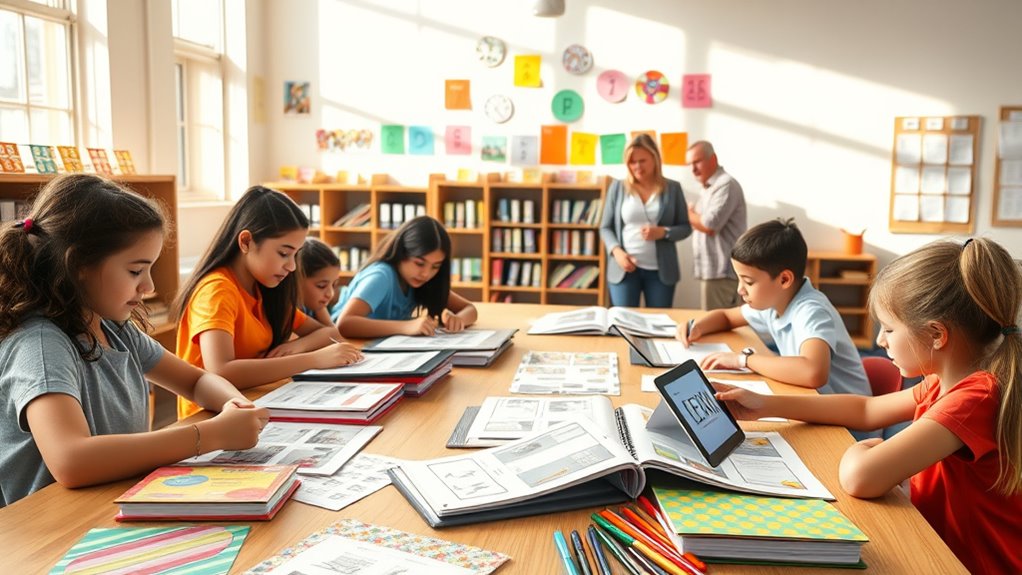
Creating a yearbook is a rewarding project that captures the memories and milestones of an entire school year. As you start this journey, one of the most important steps is encouraging student involvement. When students contribute photos, write captions, or help choose themes, the yearbook becomes a true reflection of your school community. You’ll want to create opportunities for students to participate in different aspects of the process, whether through organizing photo submissions, designing layouts, or brainstorming themes. Their input not only fosters a sense of ownership but also adds diversity and authenticity to the final product. To facilitate this, consider using design software that is user-friendly and tailored for yearbook creation. Many programs come with templates and tools that make it easier for students and staff to collaborate, even if they don’t have extensive graphic design experience. These tools often include drag-and-drop features, pre-made layouts, and customizable options, which streamline the process and ensure a professional look. With design software, you can assign different sections of the yearbook to various student groups, making the process more engaging and manageable.
Getting familiar with the software early on is key. Spend some time exploring its features, creating sample pages, and practicing layouts. This will help you understand how to make the most of the tools available and troubleshoot any issues that might arise later. When students are involved in the design process, they learn valuable skills such as layout design, color coordination, and storytelling through visuals. It’s also an excellent way to boost teamwork and creativity. As you collect content and start designing, keep in mind the importance of consistency. Use the software’s templates to maintain a cohesive theme throughout the yearbook, and set clear deadlines for each phase of the project. This way, students stay motivated and on track, knowing exactly what needs to be done and when.
Additionally, understanding the importance of collaboration can significantly enhance the quality of your yearbook project. Involving students in the design process through effective software not only makes the project more enjoyable but also results in a yearbook that truly represents your school’s spirit. It’s a way to give students a voice in capturing their memories and creating a keepsake that will be cherished for years to come. By fostering participation and leveraging intuitive design tools, you’ll find that creating a yearbook becomes a collaborative, creative, and rewarding experience for everyone involved.
![Free Fling File Transfer Software for Windows [PC Download]](https://m.media-amazon.com/images/I/41Vq6ZqHfjL._SL500_.jpg)
Free Fling File Transfer Software for Windows [PC Download]
- User-Friendly FTP Interface: Intuitive design similar to standard FTP clients
- Reliable Site Management: Easy and dependable FTP site maintenance
- Automated FTP Tasks: Supports automation and synchronization
As an affiliate, we earn on qualifying purchases.
As an affiliate, we earn on qualifying purchases.
Frequently Asked Questions
How Early Should I Start Planning My Yearbook?
You should start planning your yearbook at least six to eight months early. This gives you enough time for timeline planning and theme selection, ensuring you won’t rush important decisions. Early planning helps you organize photos, layouts, and content smoothly. By starting early, you can coordinate with students and staff, gather materials, and stay on schedule. This proactive approach results in a more polished, memorable yearbook without last-minute stress.
What Software Is Best for Designing Yearbooks?
Ever wonder which software can transform your yearbook into a masterpiece? You’ll want one with excellent yearbook layout options and powerful photo editing tools. Programs like Adobe InDesign and Canva stand out, offering intuitive interfaces and professional features. They let you customize pages effortlessly, add stunning visuals, and guarantee your yearbook looks polished. Explore these options and discover how they can turn your ideas into a stunning keepsake your school will cherish forever.
How Can I Include Personalized Student Messages?
To include personalized student messages, start by collecting heartfelt messages early. Use student message ideas like favorite memories, quotes, or future goals. Keep your personalized message tips in mind: encourage sincerity, keep it brief, and ask students to share unique details. Incorporate these messages thoughtfully into your yearbook layouts, ensuring each student’s personality shines through. This personal touch makes your yearbook memorable and meaningful for everyone involved.
What Are Cost-Effective Printing Options?
To find cost-effective printing options, you should explore digital printing, which often offers lower costs for small to medium runs and quick turnaround times. Additionally, look for vendors that provide bulk discounts, as ordering in larger quantities can markedly reduce per-unit costs. Comparing prices from different printers and considering online printing services can help you stay within your budget while ensuring high-quality yearbooks.
How Do I Gather High-Quality Photos From Students?
Gathering high-quality photos from students is like catching fireflies in a jar—bright, fleeting, but worth the effort. Encourage photo submission through fun reminders and clear guidelines, making it easy for students to share their best shots. Conduct student interviews to capture candid moments and personalities. Keep the process lively and engaging, and you’ll gather a treasure trove of vibrant images that truly reflect the spirit of your school community.
collaborative yearbook creation software
As an affiliate, we earn on qualifying purchases.
As an affiliate, we earn on qualifying purchases.
Conclusion
Now that you’re armed with tips and templates, creating your yearbook is like planting a garden of memories, each page blossoming with stories and smiles. With your creativity as the sun and your attention to detail as the watering can, your yearbook will flourish into a treasured keepsake. So, plunge in with enthusiasm—your masterpiece is waiting to be born, capturing the spirit of the year like a shining star in the night sky.

SUNEE Teacher Class Record Book for 9-10 weeks, 36 Names, 8.5×11 Inch, 104 Pages (52 Sheets), 100gsm Thick Paper, Larger Grade Recording up to 36 Students with Water-Resistant Plastic Cover, Blue
- Number of Pages: 104 pages for 11-12 weeks
- Student Capacity: Records up to 36 students
- Size: 8.5 x 11 inches
As an affiliate, we earn on qualifying purchases.
As an affiliate, we earn on qualifying purchases.
digital yearbook templates for schools
As an affiliate, we earn on qualifying purchases.
As an affiliate, we earn on qualifying purchases.