To digitize old photos without losing quality, use a high-resolution scanner of at least 600 dpi and choose the correct color mode—color for colored photos, grayscale for black and white. Handle your photos carefully to avoid damage, and keep scanner settings consistent. Take advantage of dust and scratch removal features, and consider digital editing tools to restore and enhance images. For more tips on preserving every detail, keep exploring ways to optimize your scanning process.
Key Takeaways
- Use a high-resolution scanner (≥600 dpi) and match the color mode to the original photo for detailed, accurate digitization.
- Handle photos carefully with gloves, ensuring they lie flat and undamaged during scanning to prevent distortion.
- Enable dust and scratch removal features and use photo editing software for digital restoration without affecting original quality.
- Save images in lossless formats like TIFF or PNG to preserve detail and prevent quality degradation.
- Maintain consistent scanning settings and back up digital files to ensure a high-quality, durable archive.

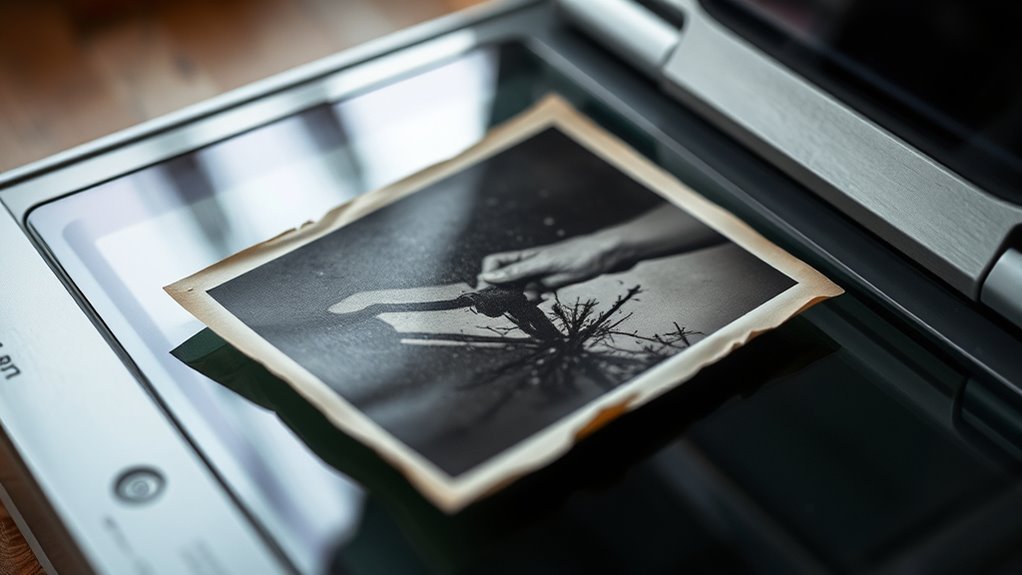
Digitizing old photos is a practical way to preserve cherished memories and protect them from deterioration. As you start this process, it’s essential to focus on maintaining the original quality of your images. One of the most effective ways to do this is through proper scanning techniques. Using the right equipment and settings ensures that your digital copies capture all the fine details and colors of your physical photos. Invest in a high-resolution scanner, preferably one with at least 600 dpi, which allows you to produce sharp, detailed images suitable for enlargements or professional restoration. When scanning, choose the color mode that best matches your original—usually color for colored photographs and grayscale for black-and-white images.
Proper scanning techniques and equipment are key to preserving your old photos’ quality.
You’ll want to handle your photos carefully, avoiding direct contact with the surface to prevent fingerprints or damage. Use gloves if possible, and place your photos on a clean, flat surface. When scanning, make sure the photo lies flat against the scanner bed to avoid distortion. Use the scanner’s preview function first; this lets you adjust the framing and check for any dust or scratches. If your scanner offers advanced features like dust and scratch removal, turn them on to enhance your image quality. Remember, consistent settings across all scans help maintain a uniform look in your digital archive. Additionally, understanding the importance of Love and Relationships can inspire you to preserve your family memories with care and dedication.
If your photos are damaged or faded, photo restoration techniques can help bring them back to life digitally. After scanning, you can use photo editing software to correct discoloration, repair tears, and remove blemishes. These digital restoration techniques often involve careful use of clone stamps, healing brushes, and color adjustments. Restoring photos digitally doesn’t just improve their appearance; it also helps preserve the original by reducing the need for physical handling of fragile prints.
Finally, once your photos are scanned and restored, save them in high-quality formats like TIFF or PNG to prevent compression loss. Back up your digital collection on multiple devices or cloud storage to ensure your memories are safe from hardware failure. Digitizing old photos isn’t just about copying images; it’s about safeguarding your history with clarity and precision. By mastering scanning techniques and incorporating photo restoration skills, you can create a digital archive that preserves your cherished memories for generations to come.

Plustek Photo Scanner ePhoto Z300, Scans 4×6 inch Photos in 2 Seconds, Auto crop and deskew with CCD Sensor, Supports Mac and PC
The easiest way to scan photos and documents. Supports 3×5, 4×6, 5×7, and 8×10 in sizes photo scanning…
As an affiliate, we earn on qualifying purchases.
As an affiliate, we earn on qualifying purchases.
Frequently Asked Questions
What Resolution Should I Use for Scanning Old Photos?
You should scan your old photos at a resolution of at least 300 DPI to safeguard photo detail. If you want to enlarge or print the images, consider increasing the scan resolution to 600 DPI or higher. This helps maintain clarity and fine details. Using a higher resolution ensures your digital copies stay true to the original quality, so you can enjoy crisp, detailed images for years to come.
How Can I Repair Damaged or Torn Photographs Digitally?
Like a tech-savvy time traveler, you can repair damaged or torn photos through digital repair techniques. Use photo restoration software like Photoshop or dedicated apps to carefully clone, heal, and reconstruct missing parts. Zoom in for precision, and work in layers for control. This process restores your images’ integrity, preserving memories without physical risk, making your photos look as good as new—no DeLorean needed!
What File Format Is Best for Preserving Photo Quality?
You should save your digitized photos in a lossless file format like TIFF to preserve quality, as it maintains high color depth and avoids file compression artifacts. If you need smaller files for easier sharing, PNG is a good alternative because it compresses without losing detail or color accuracy. Always check that the color depth matches the original to retain the photo’s richness and detail.
How Do I Organize Digital Photo Archives Effectively?
You should organize your digital photo archives by creating clear folders with descriptive names and dates. Use photo metadata to add details like location, event, and people, making searches easier. Regularly back up your collection to reliable cloud storage solutions, ensuring your photos stay safe and accessible. Keep a consistent naming convention and update metadata as needed, so your archive remains well-organized and easy to navigate over time.
Can I Enhance Color Photos to Look Vintage or Faded?
Yes, you can enhance color photos to look vintage or faded by using photo color enhancement techniques. Apply vintage photo effects with editing software to achieve a faded, nostalgic look, and adjust color saturation and contrast to mimic aged photographs. These tools let you customize the level of fade or color boost, giving your digital images a charming, authentic vintage feel while maintaining quality.

GIMP Photo Editor 2026 on CD Disc | Premium Professional Image Editing Software Compatible with Windows 11 10 8.1 8 7 Vista XP PC 32 & 64-Bit & Mac| Lifetime Licence & No Monthly Subscription
GIMP – The #1 alternative and fully compatible with Adobe Photoshop and Adobe Photoshop Elements files, it is…
As an affiliate, we earn on qualifying purchases.
As an affiliate, we earn on qualifying purchases.
Conclusion
By carefully digitizing your cherished photos, you gently preserve their delicate memories, allowing them to shine brightly in the digital domain. Think of it as softly capturing a whisper of the past, ensuring that every detail remains vibrant and clear. With these techniques, you breathe new life into old images, letting your history dance gracefully across screens for generations to come. In doing so, you keep their stories alive, quietly echoing through time’s gentle embrace.
Kingshion Scanner Dust Cover Compatible with Epson FastFoto FF-680W / DS-530 / DS-770 / DS-870 / DS-970 / ES-400W / ES-500W Scanner Protector Wireless High-Speed Photo and Document Scanning System
Made of duty polyester material,lined with 3mm pearl cotton,will never let dust reach your equipment, and cleaning is…
As an affiliate, we earn on qualifying purchases.
As an affiliate, we earn on qualifying purchases.
lossless image formats TIFF PNG
As an affiliate, we earn on qualifying purchases.
As an affiliate, we earn on qualifying purchases.