
To record video lessons with a document camera, position it directly above your workspace for a centered, clear shot. Adjust the height and angle to capture the entire document or object without distortion, ensuring it’s stable and focused. Proper lighting is key—use soft, diffuse lights to evenly illuminate your content and minimize shadows. Test your setup beforehand, make necessary adjustments, and keep the background simple for professional results. Keep going to discover more tips for flawless recordings.
Key Takeaways
- Position the camera directly above the document or object, ensuring full coverage without distortion.
- Adjust focus manually or use auto-focus to achieve sharp, clear visuals before recording.
- Set up even, diffuse lighting to minimize shadows and enhance document clarity.
- Preview the shot to verify framing, alignment, and background, making adjustments as needed.
- Conduct test recordings to check video quality, brightness, and audio, refining setup for optimal results.
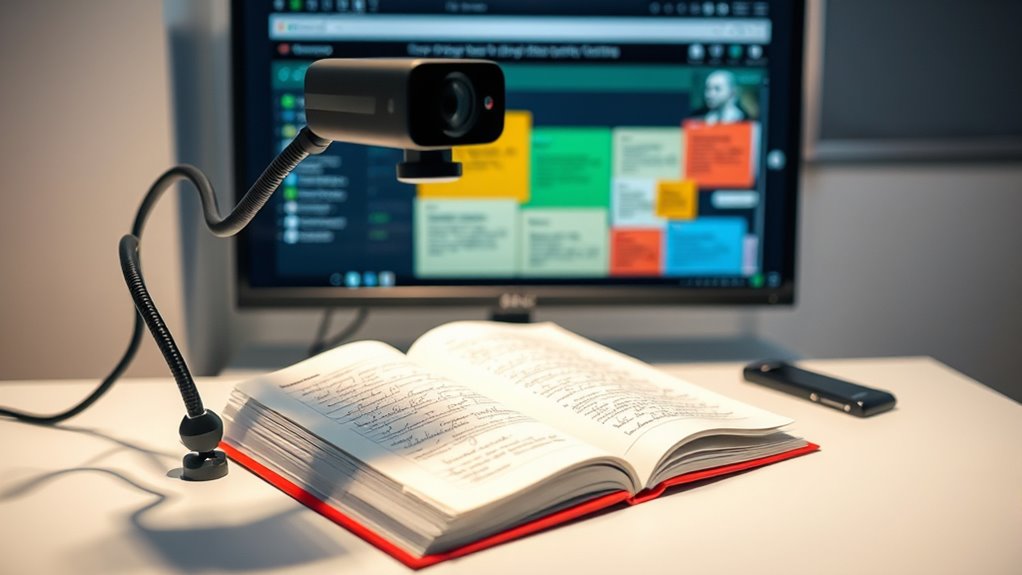
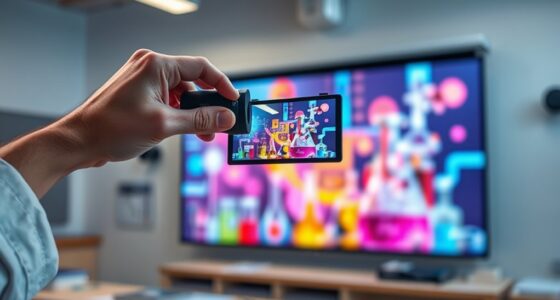
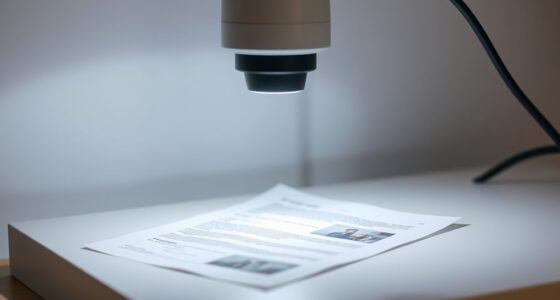
Recording video lessons with a document camera is an effective way to create clear, engaging instructional content. To do this successfully, you need to start with a proper camera setup. Position your document camera directly above your workspace to verify the content is centered and easily visible. Adjust the camera’s height and angle to capture the entire document or object without distortion. Many document cameras have adjustable arms or mounts, so take advantage of these features to find the best position. Make sure the camera is stable, either mounted securely or placed on a steady surface, to prevent shaky footage. Check the focus before recording—most cameras have an auto-focus feature, but if yours doesn’t, manually adjust the lens for sharp clarity. Test the framing by previewing the shot, verifying all relevant material is within the frame, and leave enough space for annotations or overlays if needed.
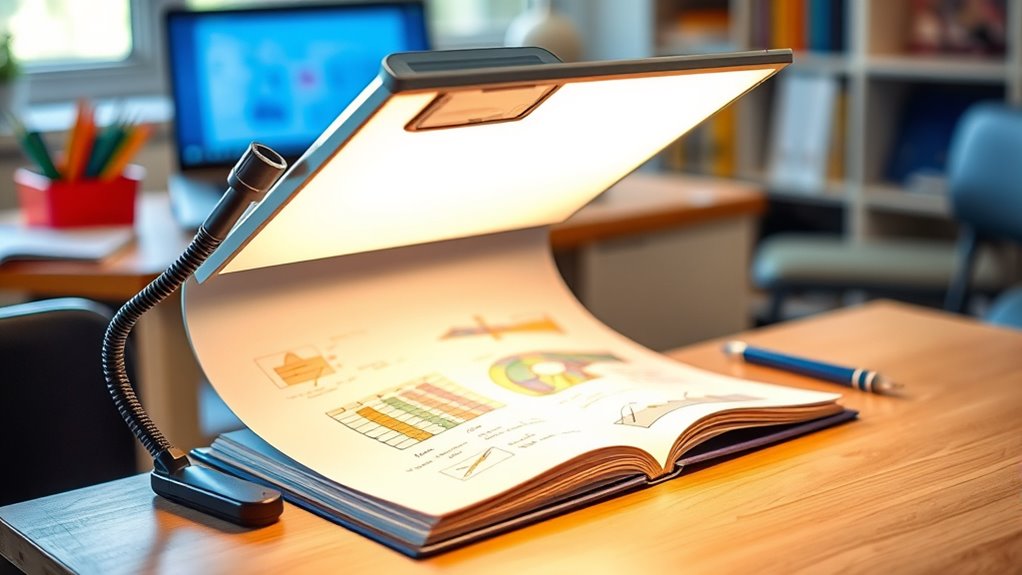
Lighting techniques play a vital role in guaranteeing your video lessons are clear and professional. Good lighting eliminates shadows, enhances contrast, and makes your content more readable. Start by positioning your light sources to evenly illuminate your workspace. Natural light works well if you have a bright window, but avoid direct sunlight that can cause glare or uneven brightness. If you’re using artificial lighting, opt for soft, diffuse lights—desk lamps with adjustable arms or softbox setups work great. Place the lights at angles that minimize shadows on your document or object. Avoid placing lights directly behind you or in front of the camera, as this can cause glare or wash out your image. Experiment with different lighting positions and intensities to find what produces the clearest, most balanced image. Remember, consistent lighting helps your audience focus on the content without distraction, so avoid flickering or overly bright spots. Additionally, understanding the importance of color accuracy can significantly improve how viewers perceive your visuals, ensuring that the colors in your recordings are true to life.
Once your camera setup and lighting are in place, do a quick test recording to check for clarity, brightness, and framing. Adjust as needed until you achieve a professional-looking shot. Keep in mind that simplicity often works best—avoid cluttered backgrounds or distracting reflections. A well-lit, properly positioned camera ensures your viewers can easily follow along with your lesson, making the learning experience more effective. With a little practice, you’ll develop a setup that consistently produces high-quality recordings, making your instructional videos more engaging and impactful.

ViewSonic VB-VIS-002 8MP USB Document Camera with Adjustable Arm, Auto Focus, Digital Zoom with Windows, MacOS, and Chrome OS Support
ULTRA HIGH DEFINITION CAPTURE: The VB-VIS-002 features an 8 Megapixel camera for capturing images up to 3264 x…
As an affiliate, we earn on qualifying purchases.
As an affiliate, we earn on qualifying purchases.
Frequently Asked Questions
What Are the Best Lighting Conditions for Recording With a Document Camera?
When recording with a document camera, you want a good lighting setup to guarantee clear visuals. Use soft, diffuse light to avoid harsh shadows and glare. Natural light is ideal, so position your setup near a window, but avoid direct sunlight that can cause overexposure. Supplement with artificial lights if needed, aiming for even illumination. Proper lighting helps your content look sharp and professional, making your video lessons more engaging.
How Can I Minimize Background Noise During Video Lessons?
You might worry background noise will ruin your lessons, but noise reduction techniques can help. Start by placing your microphone close to you for clearer audio and less background interference. Use a noise-canceling microphone or add soft materials around your space to dampen sound. Regularly check your audio levels and do a quick test recording. These steps guarantee your lessons sound professional, engaging, and free from distracting background noise.
What Editing Tools Are Recommended for Enhancing Recorded Videos?
When enhancing your recorded videos, you should use editing tools that focus on video stabilization to make certain smooth playback and audio enhancement to improve sound quality. Programs like Adobe Premiere Pro, DaVinci Resolve, or iMovie offer these features. You can stabilize shaky footage and boost audio clarity, making your lessons more engaging and professional. These tools help create polished videos that keep your audience focused and attentive throughout your lesson.
How Do I Troubleshoot Common Connectivity Issues With the Camera?
If you’re facing connectivity issues, start by checking your WiFi interference, which can disrupt the camera’s connection. Verify your camera’s cable connection is secure, as loose cables cause problems too. Restart your router and camera to reset the connection. Move closer to the WiFi source if signal strength is weak. Updating firmware or drivers can also fix persistent issues. Troubleshooting these common problems helps keep your camera working smoothly.
Can I Use a Document Camera for Live Streaming Lessons?
Think of your document camera as a window into your classroom. Yes, you can use it for live streaming lessons. To guarantee clear video quality, focus on proper camera positioning—place it at the right angle and height. Keep your workspace well-lit and check connections beforehand. When set up correctly, your students will enjoy a smooth, engaging experience, as if they’re right there with you.

Torjim Softbox Photography Lighting Kit, 16'' x 16'' Professional Softbox Lighting Kit with 85W 3000-7500K LED Bulbs, Studio Lights for Photography/Video Recording/Live Streaming/Portraits Shooting
【Illuminate Your Creativity】 Torjim softbox lighting kit is made of high-quality PET fabric and a foldable nylon cover,…
As an affiliate, we earn on qualifying purchases.
As an affiliate, we earn on qualifying purchases.
Conclusion
Now that you know how to record video lessons with a document camera, you’re ready to hit the ground running. Remember, practice makes perfect, and the more you use your equipment, the better your videos will become. Don’t be afraid to experiment and find your groove—after all, Rome wasn’t built in a day. With a little patience and persistence, you’ll be creating engaging lessons that truly resonate with your students in no time.

Gawervan 8MP USB Document Camera, Auto Focus, LED Light, Image Reversal, Built-in Mic, Mac OS, Windows, Chromebook for Distance Learning, Remote Teaching, Web Conferencing, Live Demo
Instant Image Control for Dynamic Lessons: The Gawervan KB700 document camera empowers teachers with 2884P/8MP ultra-crisp resolution and…
As an affiliate, we earn on qualifying purchases.
As an affiliate, we earn on qualifying purchases.

Weilisi 10.2" Desk Ring Light with Stand, 360° Rotate Desk Lamps for Home Office with C-Clamp, Flexible Height Desk Light, Adjust Arm Ring Light for Desk, Podcast, Gaming, Recording, Zoom Lighting
Soft & Uniform Desk Lamps for Office -Weilisi full-screen desk light provides enough uniform & diffused light, restores…
As an affiliate, we earn on qualifying purchases.
As an affiliate, we earn on qualifying purchases.